How to Make Nucleus Colonies From Your Own Hives
This post contains affiliate links. As an Amazon Associate, I earn from qualifying purchases at no extra cost to you.
Making nucleus colonies from your own hives is the fastest way to expand your apiary, prevent swarming, and ensure you have backup colonies headed by queens you’ve vetted yourself. Unlike buying nucs from a supplier (which can cost $150-$250 each), creating your own costs roughly $40-$60 in equipment and time. You’re working with bees you already know, using your own genetic lines, and building resilience into your small-scale beekeeping operation.
Right now, in mid-June, is the critical window for making nucs. You have strong colonies with excess bees, brood is plentiful, and you have 8-10 weeks before the main nectar flow winds down. Nucs made now will have time to build population through late summer and early fall, arriving at winter with a real chance of survival. Wait much longer, and you’ll be setting up young colonies that lack the population cushion they need for the cold months ahead.
This guide walks you through the entire process: assessing which hives to split, gathering the right equipment, timing your splits, managing queens, and troubleshooting the mistakes that derail first-time nuc makers. You’ll understand why some approaches work better than others and when to deviate from the standard playbook based on your specific circumstances.
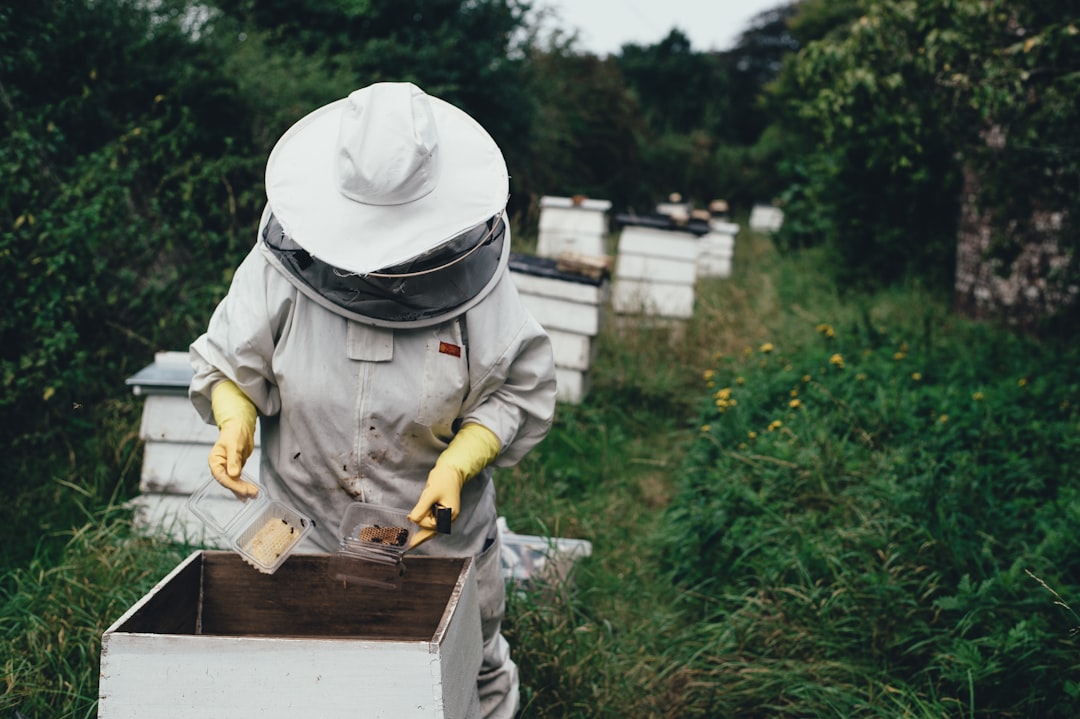
Photo by Annie Spratt on Unsplash
Why and When to Make Nucleus Colonies
A nucleus colony is a small, functional hive with the essentials: a queen, a handful of frames of brood and food, and a population of bees to care for them. You’re essentially creating a miniature version of a full colony that will grow into a standard hive over the course of the summer and fall.
The practical advantages are substantial. First, cost. Buying a three-frame or five-frame nuc from a commercial breeder runs $150-$250 per unit. When you make your own, you spend maybe $40-$60 on frames, foundation, a box, and supplies. If you already have spare equipment sitting around (and most beekeepers do), you’re mostly paying for the queen. Scale this up: making four nucs saves you $400-$800.
Second, genetics and health. You control exactly which queen and which colonies contribute genetics to your new nucs. If you’re tracking hive temperament, productivity, or mite resistance, you can make deliberate selections. You also avoid the disease and parasite risks that come with purchasing from an unknown apiary. Your nucs are made from your own hives, so you know their health status from inspection records.
Third, swarm prevention. A strong colony in June is primed to swarm. By splitting a colony into a nuc and a reduced parent hive, you lower the population pressure that triggers swarming behavior. You’re both managing a real problem and gaining a new colony in the process. This is far more productive than simply destroying swarm cells or watching a swarm leave with half your bees.
Fourth, bee stock recovery. If a colony dies over winter, you have a nuc (now a full hive) in reserve. In hobbyist and small-scale beekeeping, this redundancy matters. Losing 25% of your hives to winter loss is normal. Having a nuc you made in June means you can replace a dead colony with a live one you’ve already established.
Fifth, the urgency window. Making nucs now in June means they have roughly 8-10 weeks to build population before the nectar flow truly slows. A nuc started in August or September rarely builds sufficient population to survive winter. A June nuc, properly managed, often comes through with 6-8 frames of brood and a solid food supply by late October.
Many beekeepers also make nucs as a skill-building exercise. Learning to identify and move a queen safely, manage a small population, and monitor a mini-hive teaches you lessons that improve your overall beekeeping. The stakes are lower than working a full-size colony, and the feedback is faster.
Timing Your Nuc Creation
The timing of your nuc creation determines whether it thrives or struggles. The practical window in your region depends on your climate, but the underlying principle is universal: you need strong colonies with excess brood to draw from, and you need enough season remaining for the nuc to build population.
For most hobbyists in the northern and central United States, the ideal window is late May through mid-June. We’re writing this in mid-June, which means you’re at the tail end of the sweet spot. If you have strong colonies right now, you should be making nucs this week or next. Waiting until July risks creating a colony that will be under-populated come September.
Check your hives before committing to a nuc split. You need at least two colonies strong enough that they can each spare roughly two to three frames of brood. A strong colony in mid-June should have at least two or three full frames of capped brood, an egg frame, and multiple frames of capped honey and pollen. If your hive has only one or two frames of brood, leave it alone. A weak colony can’t spare bees without collapse.
Also evaluate your local flow. If your region is already in the main nectar flow, your window is narrower. Bees will be focused on foraging and storing rather than expanding the population. If you’re in an area with a slight lull between spring flow and summer flow, that’s your moment. Ask beekeepers in your local club or check your state extension resources for flow timing in your area.
The age of your queen matters too. A new queen (less than a year old) will lay more reliably in a small space than an older queen. If you’re creating a nuc from a hive headed by a two-year-old queen and you have a year-old queen available, use the younger one if possible. But don’t avoid making a nuc just because your source colony has an aging queen. A consistent queen, even if older, is better than an unreliable young one.
Weather plays a role as well. You want to create your nuc on a day when bees are actively foraging and the temperature is stable. A cold front or rain three days after you split can chill brood and deplete your nuc’s bee population if the colony can’t maintain warmth. Plan splits for warmest part of the day, ideally mid-morning onward.
Finally, consider your local predators and challenges. In areas with strong Varroa pressure, you might want to create nucs from your most resistant colonies. In regions with high swarming genetics, a mid-June split actually serves double duty as swarm prevention.
Gather Your Equipment
Before you touch a hive, assemble everything you’ll need. Having equipment ready reduces the time bees are exposed and minimizes stress on the colony you’re splitting.
For the housing unit, you need a small box. A standard five-frame nuc box is the most common choice for hobbyists. It holds five frames (compared to ten in a deep box), is easy to manage, and takes up minimal space. The 5-Frame Nuc Beehive Box for Beekeeping includes frames and is a complete setup. Expect to pay around $30-40 for a complete nuc box setup.
You’ll also need frame foundation. Nucs work best with foundation already installed in frames because it guides comb building and saves the bees energy. The Beehive Foundation Sheets 20-Pack gives you extras for repairs and future splits. Plastic foundation is durable and bees accept it readily once they’ve drawn comb on it.
If you’re using frames pulled from existing hives (which many beekeepers do), ensure they’re clean and have no significant damage. Rough spots or cracks invite disease. If you don’t have spare frames, you’ll definitely want foundation or drawn comb to put in the nuc box.
You’ll need ventilation and protection. A solid cover and a bottom board that allows air flow are standard. Some beekeepers drill small holes in the cover for air circulation during the first few days after the split. Others use a spare screen board instead of a solid bottom. Check your nuc box design and modify as needed.
For the bee transfer itself, you need a queen cage (if you’re introducing a new queen rather than keeping the original) and a frame divider to keep the small population compact. A queen cage serves multiple purposes: it lets the workers become accustomed to a new queen’s pheromone before she’s fully free, and it prevents her from laying eggs in areas the bees haven’t fully prepared. The Queen Rearing Kit with Queen Cage System is useful if you plan to raise your own queens or manage multiple queens. For a simple one-time split, a basic plastic cage (often $3-5) suffices.
You’ll also want a feeder. A nuc doesn’t have the resources of a full hive, so supplemental feeding accelerates build-up. A small entrance feeder or a top feeder designed for small equipment works well. Many beekeepers use a simple jar inverted over a screened block.
Grab a reliable smoker (you already have one), a hive tool, and a brush. You want to work methodically and calmly, especially when moving the queen. A good resource for understanding frame standards and specifications is the Mann Lake frame guide, which clarifies frame dimensions if you’re mixing equipment from different sources.
Labels help too. Write the date and source colony on your nuc box so you can track performance and genetics over time. You’ll want to know which parent hive produced your best nuc.
Step-by-Step: Creating Your First Nucleus Colony
The actual splitting process is straightforward once you understand the sequence. Work during the warmest part of the day and move methodically to minimize bee stress.
-
Identify and locate the queen in your source hive.
You absolutely must find the queen before moving frames. If you move a frame with the queen into the nuc when you thought you weren’t, you’ve disrupted both hives and confused your records. Spend time looking. Check every frame systematically. If you can’t find her, mark the frame you’re most confident about and check again in 30 minutes. A frame she’s laying on is easiest to spot because you see eggs. If your hive has a young, fast-moving queen, ask a local beekeeper to help you spot her the first time. This skill transfers fast once you’ve seen it done.
-
Prepare your nuc box near the source hive.
Set it on a stand or table so it’s at a comfortable working height. Install the frames and foundation. If you’re using drawn frames, set them in place. If you’re using bare foundation, gently press the foundation into the grooves of the frame so it sits securely. Place your feeder in position but don’t fill it yet.
-
Select your source frames.
You need two to three frames of brood (sealed and unsealed), one to two frames of pollen and honey (food stores), and one to two empty or lightly drawn frames. The brood frames should have a range of ages: some capped brood ready to emerge, some uncapped brood in the middle stages, and some eggs and young larvae. This ensures the nuc has young bees emerging throughout the coming weeks.
-
Move the brood frames into the nuc, but not the queen.
Carefully lift the brood frame from the source hive and shake most of the bees back into the hive. You want some bees adhering to the brood (they’ll continue incubating it), but you don’t want to transfer the entire bee population yet. Place the frame into the nuc. Repeat with your second and third brood frames. The goal is to move brood without catastrophically depleting the parent hive’s work force.
-
Add a frame of honey and pollen.
Position it at the edge of the brood cluster. The nuc needs food for a week or more while it gets organized. A good frame of honey and pollen can support the colony through the first critical days.
-
Shake bees into the nuc.
Now you need bees. Go back to the source hive and select a frame with young bees but no brood (a frame of honey or pollen with adhering bees is ideal, or a frame with mostly empty comb). Shake the bees directly into the nuc box. Do this a couple of times until you have a decent population. You want roughly two to three times as many bees as the initial frames brought in, because some will wander back to the source hive, and you need enough to cover all the brood.
-
Manage the queen.
You have two options here. Option A: Keep the original queen from the source hive in the nuc (only if you’re making one nuc from that hive). Option B: Introduce a new, mated queen via a cage. Most beekeepers choose Option B because it lets them keep the source colony’s queen laying in the parent hive, accelerating its recovery. If you’re introducing a new queen, place her in a cage (usually plastic with a small candy plug that workers chew through over a few days). Wedge the cage between two frames so she’s surrounded by her new bees. They’ll chew through the candy, she’ll emerge, and acceptance is usually swift because there’s no incumbent queen to fight.
-
Add the final empty frame and close up.
If your nuc has room, add one empty or lightly drawn frame. This gives the queen space to lay without forcing her immediately to the edges. Close the nuc box with its cover, ensuring it’s secure and level.
-
Secure the nuc so bees don’t escape.
You’ll place the nuc in its permanent location after a week or two, but initially, you can leave it right next to the source hive while bees orient. Some beekeepers move the nuc 20-30 feet away immediately to prevent drift. Others keep it next to the parent for a few days, then move it. The standard recommendation is to move it at least 10 feet away or obscure its original location so bees don’t home back to the source hive.
-
Feed immediately.
Fill your feeder with a 1:1 sugar water solution (by weight) or a light nectar substitute. A nuc needs this supplemental food to build population without stress. Continue feeding until the colony has three or four frames fully covered with bees and stores are adequate.
Throughout the process, work calmly and cover the source hive frequently to keep it warm and prevent robbing. A split hive is temporarily weakened and vulnerable to robbers. If you’re working on a warm day, this is less critical, but autumn splits require more protection.
Queen Management for New Nucs
The queen is the bottleneck in a growing nuc. Everything else the colony needs (brood, food, space) can be managed from outside, but you can’t manufacture a queen, and a queenless nuc will fail.
You have three paths to queen a new nuc. First, you can take the original queen from the source hive. This works if you’re making only one nuc and you’re willing to let that source colony re-queen from capped queen cells or purchased queens. The advantage is certainty: you know the queen is fertile and healthy. The disadvantage is you’ve slowed the source hive’s recovery. It will take 3-4 weeks for a new queen to emerge and begin laying, during which population dwindles.
Second, you can introduce a mated queen purchased from a breeder. This is the most common approach. A mated queen from a reliable supplier (check Dadant’s directory of queen sources for recommended breeders) is guaranteed healthy and fertile. You’ll pay $15-30 per queen, which is a real cost but worth it if you’re scaling up. The risk is availability: in late June, some breeders are sold out or have long wait lists. Order now if you plan to make multiple nucs.
Third, you can allow the nuc to raise its own queen from eggs or young larvae in the brood frames you transferred. This is riskier and slower. If you include an egg frame or young larvae frame, the bees can build queen cells and raise a replacement. However, this takes 16+ days from the egg, so you’re looking at mid-to-late July before she’s laying. She also might mate poorly if weather is bad, and you have no control over her genetics. This method works if you’re comfortable with some uncertainty and you want free queens.
For most hobbyists making their first nuc, buying a mated queen is the smart move. You can specify breed (Italian, Carniolan, Russian hybrid, etc.), and you remove a major source of failure. Many regional queen breeders also have June availability if you contact them now.
When introducing a mated queen to a nuc via a cage, the timeline is straightforward. The cage stays in for 5-7 days. During this time, the workers chew the candy plug and gradually accept her pheromone. On day 5 or 6, carefully remove the cage by gently prying it out and watching for peaceful acceptance. If workers are balling her (clustering aggressively), immediately replace the cage and wait another day or two. Once she emerges, leave her alone for 48 hours before you do any inspection. By day 10-14, she should be laying. If she isn’t laying after 21 days, something went wrong. This is rare with a healthy, mated queen, but if it happens, replace her immediately rather than waiting.
A critical detail: avoid opening the nuc more than necessary during the first 10 days. Every inspection risks cooling brood and alarming the colony. Resist the urge to check on the queen cage daily. Wait at least 5 days before your first check. Between days 5 and 7, do a quick visual confirm that she’s emerged and the cage is empty, then close it back up.
Common Mistakes When Making Nucleus Colonies
Beginners often repeat the same errors when splitting. Knowing what to avoid accelerates success.
Moving too much brood too early. The most common error is taking a four-frame nuc’s worth of brood from a hive that only had five frames of brood to begin with. You’ve left the parent hive unable to maintain incubation temperature and population growth. The nuc thrives, but you’ve killed the source colony. Solution: only split a colony that can visibly spare the brood. Two strong colonies are better than one thriving nuc and one wrecked hive. A good rule of thumb is that the parent hive should have at least 60-70% of its original brood removed. If you’re in doubt, don’t split.
Creating a nuc without ensuring bee coverage. Brood dies if there aren’t enough bees to incubate it. A nuc with four frames of brood but only two frames of adult bees is doomed. When you shake bees into the nuc, you need enough bodies to completely cover all the brood frames. This often means adding more bees than feels intuitive. It’s okay if your source hive becomes temporarily under-populated (it recovers fast), but your nuc needs full coverage immediately.
Introducing a queen to a strong population of workers. If the workers haven’t had time to accept her pheromone, introduction can fail. This is why caging works. Workers smell her through the cage mesh, become accustomed, and by the time she emerges, she’s “theirs.” Releasing a queen directly into a hostile nuc (no cage) often ends with her being killed or, if she survives, unable to lay because she’s stressed and chased constantly. Always cage new queens during introduction, even if your source hive had plenty of good vibes.
Forgetting to feed. A nuc is a resource-limited environment. Without supplemental feeding, workers resort to foraging or pilfering from nearby hives, or the population starves. A nuc with two to three frames of food stores can last 7-10 days, but that’s cutting it close. Start feeding immediately after the split. Continue until the nuc has built up to at least three frames of capped food stores of its own.
Returning the nuc to the source hive location too soon. If you place the nuc directly next to or touching the source hive and don’t move it immediately, forager bees from the nuc will orient to the original hive location and drift back to it. The nuc’s population hemorrhages away. Move the nuc at least 10 feet away, or better yet, place an obstruction (a board, a shrub, a different orientation) so returning bees don’t recognize the location and naturally land at the nuc instead. After three weeks, the nuc’s bees are fully oriented to their new location and drift is no longer a major risk.
Making a nuc and then neglecting it. A nuc needs more frequent monitoring than a standard hive because problems escalate faster in a small population. Check the nuc weekly for the first month. Verify the queen is laying by week two. Confirm food stores are adequate. If a predator damages the nuc box or a neighbor colony tries to rob it, a nuc can collapse in 48 hours. A full hive might weather the same threat. This doesn’t mean you obsess over it, but don’t treat it like a set-and-forget project.
Misidentifying readiness for promotion. At some point, your nuc is ready to expand into a full-size hive. This usually happens 6-12 weeks after creation, when the colony has six to eight frames of capped brood and stores approaching capacity. Don’t wait until frames are literally full or the queen has nowhere to lay. Move the nuc up to a full-depth box before it becomes too crowded. If you wait too long, the population will be large but the queen’s laying will have slowed, and you’ll have missed the window to build winter population.
FAQ
How many nucs can I make from a single hive?
In most cases, you can safely make one nuc from a strong hive without crippling the parent colony. Two nucs from one hive is possible but aggressive, only advisable if your hive is exceptionally strong (eight or more frames of brood) and you’re making both simultaneously so the parent doesn’t over-recover and starve before you split the second time. Three or more nucs from one hive typically weakens it so much that it struggles to rebuild before winter and may require emergency feeding or combining with another colony in fall. If you want multiple nucs, it’s better to make one from each of several colonies. This spreads the impact and gives you insurance: if one source colony is queenless or sick, you haven’t lost all your nuc material to a single bad hive. From a hobbyist perspective managing 2-4 hives, you’re usually looking at making one nuc per hive per year, maybe two in exceptional years.
What do I do if my nuc’s queen doesn’t lay after 21 days?
A queen should begin laying 10-16 days after introduction or emergence. If she hasn’t by day 21, something is wrong. Options: (1) The queen is infertile or diseased. This sometimes happens with purchased queens, though it’s rare. (2) The queen wasn’t actually introduced or escaped. Check whether the cage is truly empty and whether she’s actually in the box. (3) The colony is queenless and killed her. This is uncommon with a caged introduction but possible if you released her too early to an aggressive population. Action: If you’ve confirmed the queen is present, healthy, and the cage is empty, you might wait another week. Some queens take time warming up, especially if it’s been cool or rainy and the colony is clustered. But if you hit day 28 with no eggs, replace her immediately. Don’t nurse a barren queen through summer hoping she’ll miraculously start laying. Pull her, save her (or discard her), and introduce a new one. A queenless colony in June is a time-sensitive problem. Every week without a laying queen is a week of population loss.
Can I make a nuc in the fall instead of summer?
Technically yes, but it’s fighting biology. A nuc made in August or September will struggle to build population before winter dormancy. Even if the queen lays well and the weather is perfect, a colony that’s only two months old by October rarely has enough population and stores to survive winter without emergency feeding or even combining with another colony in late fall. Extension research (check your state’s apiary extension site for specifics) generally shows fall nucs have 40-50% overwinter survival for beginner beekeepers, compared to 70-80% for summer nucs. If you’re making nucs for the first time, do it now in June or early July. By September, focus on building population in existing colonies and preparing for winter. If you must make nucs later, do so with a clear plan to combine two or more together in early November, creating a single stronger colony that’s more likely to survive.
What’s the difference between a nuc and a split, and should I care?
A nucleus colony (nuc) is typically three to five frames of bees with a queen, in a small box meant as a temporary home. A split, more formally, is dividing one colony into two, usually creating a parent hive and an essentially-new hive of equal or similar size. For practical hobbyist purposes, the distinction blurs. When you make a nuc and leave a parent hive with four frames of bees and brood, you’ve essentially made a split: two functional colonies from one. The terminology doesn’t matter much, but conceptually nucs are small and designed to grow, while a true split might involve dividing a colony more evenly, creating two medium-sized units instead of one big unit and one small one. For managing swarms, the small-nuc approach (leaving the parent strong and creating a small separate unit) is superior because it prevents swarming while giving you a bonus colony.
Conclusion
Making nucleus colonies is the simplest, cheapest, most reliable way to expand your apiary without commercial dependency. You gain control over genetics, eliminate disease risk, and solve swarm problems in a single action. In June, the conditions are ideal: strong colonies with excess bees, abundant brood, and enough season left for a new nuc to mature before winter.
Start with one nuc if this is your first attempt. Get the queen right, feed consistently, and monitor weekly. Once you’ve successfully brought one through to a laying queen and watched her population grow, you’ll be confident making more next year. The skill compounds: your second nuc takes half the mental effort of your first, and by year three, you’ll be making nucs efficiently and maybe even raising your own queens.
Make your first nuc this week or next week. The window is closing, and late June into early July is your last realistic chance for a summer nuc.
Subscribe to stay updated on new beekeeping guides, and comment below if you’ve made nucs successfully or run into questions about the process.
Related Reading
Learn more about what you’re creating with What Is a Bee Nuc? Nucleus Colony Guide. For alternative approaches to managing swarms and growing your apiary, read How to Split a Hive to Prevent Swarming.