Bee Nucs for Sale: What to Look for Before You Buy
This post contains affiliate links. As an Amazon Associate, I earn from qualifying purchases at no extra cost to you.
The good news: you can protect yourself with a checklist. Most nuc quality problems are visible before you hand over cash. You just need to know what to look for. Whether you’re buying locally at pickup, negotiating a long-distance shipment, or sourcing from a breeder, the same core evaluation criteria apply. This guide walks you through every sign of health that matters, which sources are trustworthy, and how to time your purchase for the best outcomes.
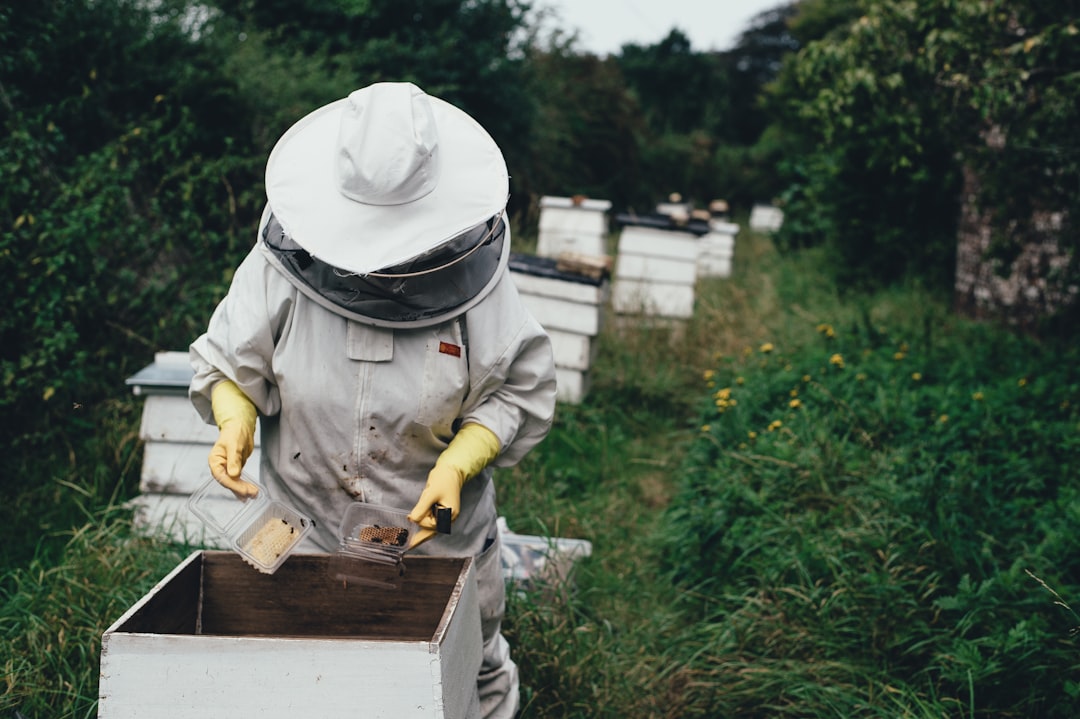
Photo by Annie Spratt on Unsplash
What Is a Nucleus Colony and Why Buy One?
A nucleus colony is a small, self-contained starter hive. It’s typically housed in a 5-frame box (though 3-frame and 10-frame versions exist) and contains a laying queen, a few thousand bees, and at least three frames of brood in various stages. The idea is simple: you’re buying a miniature hive that’s already functional. No waiting for bees to draw comb from wax foundation. No mystery about whether your package bees will accept their queen. No stress about whether the colony will make it through its first month.
For a hobbyist or small-scale keeper, a nuc is often the smartest move. A package of bees costs roughly the same amount, but a nuc saves you a month of critical early development. The queen is already installed and laying. The colony has zero nutritional stress in its first days because it has food stores and bee bread already laid in. If you’re buying a nuc in late spring (May or June), that colony can build itself into a full hive by mid-summer, making it a viable candidate for a honey crop in year one.
That said, you’ll need to have housing ready before your nuc arrives. Grab a Goodland Bee Supply 5-Frame Nuc Box Pine to have on hand as a backup, or plan to transfer your frames directly into a larger hive box (called a “transition” or “buildup” strategy). The key is not scrambling for equipment after you’ve already purchased bees. Many beekeepers overlook this, leading to hive stress and poor outcomes.
The nuc market itself is split between two main sources: hobby breeders and small commercial producers. Hobby breeders often specialize in a single stock or queen line and may sell only a handful of nucs per year. Commercial nuc operations might produce 50 to 200+ nucs annually. Neither is inherently better, but they have different reliability profiles. A hobby breeder knows every colony personally but may not have backup supply if something goes wrong. A commercial operation has inventory depth but less time for individual colony assessment. Your job is to understand what you’re getting from each.
Critical Signs of Health to Check Before You Buy
Before you shake hands or wire money, you need to inspect the nuc in person or get a trusted, specific video walkthrough. A seller who won’t show you the colony is a red flag. Here’s what to look for.
Brood pattern: The most important signal of colony health is the brood pattern on the sealed brood frame. A queen laying well produces a cluster of capped brood cells that fills most of the frame in a dense, contiguous patch. Gaps and scattered cells mean the queen is either young and still ramping up, or she’s failing. For a nuc you’re buying mid-spring (April-June), the sealed brood pattern should be nearly solid on at least two frames. If you see more than 20-30% empty, unsealed, or killed cells in the brood cluster, the queen is suspect.
Bee count and coverage: Open the box and count the frames that are genuinely covered with bees. A healthy 5-frame nuc should have bees covering all five frames, with at least two frames covered on both sides. If the seller only has bees on three frames with light coverage on the fourth, the nuc is underbred. You’re paying for a colony that won’t expand fast enough to be useful before mid-summer. Ask directly: “How many frames have double-sided bee coverage?” Honest sellers will know and tell you without hesitation.
Eggs and very young larvae: Crack open a brood frame and look for eggs in the cells. Eggs are tiny (about the size of a sesame seed) and are laid on the bottom of open cells. If you see hundreds of eggs scattered across the brood area, the queen is actively laying and the colony is young and vigorous. If you see almost no eggs, either the queen is old or she’s recently gone through a laying pause (not ideal for a nuc you’re relying on). Very young larvae, tiny coiled white worms in open cells, should be visible too. A colony with strong egg-laying and early larvae indicates a queen with high fitness and good genetics.
Food stores: Look at the frames that don’t have brood. A nuc should come with at least two frames that are partially filled with pollen and honey. If the frames are almost barren, the seller is squeezing profit by not feeding the bees properly before pickup. A well-fed nuc is more resilient and grows faster. This matters more if you’re picking up early in the season (April or early May) when forage is still unpredictable and bees depend on stored nutrition.
Disease and pest signs: This is non-negotiable. Check for any visual signs of disease or pest damage. Chalkbrood (mummified larvae that look like chalk) or American foulbrood (a slimy, brown residue in cells that smells like rotting fish) are instant deal-breakers. Ask the seller directly if the colony has ever been treated for nosema, varroa mites, or tracheal mites. A responsible breeder can answer this question. If they can’t or they seem evasive, walk away.
You should also look for evidence of recent treatments. Small hive beetles leave sticky, dark trails in the cells and on comb. Varroa mites can sometimes be spotted on drone brood or clustered at the hive entrance. If the seller has been managing pest pressure responsibly, they’ll be transparent about treatments used and when they were applied. Don’t buy blind when pest history is uncertain.
Demeanor and temperament: Open the nuc and observe how the bees respond. A healthy, well-bred colony will be calm and curious, not defensive or erratic. If the bees are flying chaotically, clustering aggressively on the lid, or stinging at the slightest provocation, something is wrong. This could indicate a poor-quality queen, a colony stressed by shipping, or an overly defensive genetic line. You want bees that are easy to work with and pleasant to manage. Temperament matters for your mental health as much as it does for productivity.
Frame Type and Foundation Choice
Not all nucs are built on the same equipment. Before you buy, clarify which frame type and foundation the nuc is built on. This matters because when you transition the nuc into your own hive, mismatched frame dimensions create problems.
Deep frames versus medium frames: Most commercial nucs use 5-frame medium boxes because they’re lighter and easier to ship. However, some breeders build nucs in deep frames. You need to know which one you’re getting. If your main hive is set up with deep frames and your nuc comes on mediums, you’ll need to either keep the nuc in its small box longer, or transfer the frames to a full-size deep box, which creates alignment and comb issues. Conversely, if your hive is medium-only and you get a deep nuc, you’ve got the same problem.
Foundation type: Frames come with three types of foundation: plastic, wax, or foundationless (just the frame, no comb guide). Bees on plastic foundation are often slower to draw comb than those on wax. Foundationless frames give the bees complete freedom and often result in thicker, stronger comb, but they’re harder to transfer if they break. Most quality nucs come on either wax or plastic. Ask the seller, and make sure your main hive setup matches. Mixing foundation types mid-season causes bees to propolize the transitions heavily, making frame removal difficult.
Drawn comb versus undrawn: The best nucs come with at least some frames that have been partially drawn and possibly even capped. A frame with comb already on both sides accelerates your nuc’s integration into the larger hive. Undrawn foundation means the bees still need to secrete wax and build, which is energy and time your young colony can’t afford to waste. Most hobby breeders include at least 2-3 drawn frames in a nuc for this reason.
When evaluating nucs from different sellers, pick up a simple comparison table to clarify trade-offs:
| Seller | Frame Type | Foundation | Drawn Frames | Queen Age | Price | Transport |
|---|---|---|---|---|---|---|
| Breeder A | Medium | Wax | 3 of 5 | Marked | $150 | Local |
| Breeder B | Deep | Plastic | 2 of 5 | Unmarked | $140 | Shipped |
| Breeder C | Medium | Wax | 4 of 5 | Marked | $175 | Local |
This type of side-by-side breakdown helps you see trade-offs at a glance. Breeder C’s nuc costs more, but you get more drawn comb and a marked queen, which saves you time on inspection later and makes future requeening decisions far easier.
Seasonal Timing and Source Selection
When to buy: The best time to purchase a nuc is late April through May, depending on your region. At this point, spring forage is flowing, queens are in peak laying condition, and you have enough time for the nuc to build into a production hive before summer heat or fall decline. Buying in June or July means your colony will spend most of the summer in catch-up mode and may not reach full strength until next year.
Very early nucs (March or early April) can work, but they require constant management. The bees are building from almost nothing, the weather is unpredictable, and the colony is vulnerable to starvation if a cold snap hits and nectar dries up. For beginners, avoid March nucs unless a local breeder is offering them and you have infrastructure to feed heavily if needed. The risk of failure is simply too high.
Fall nucs are rare and should generally be avoided. A nuc installed in September has no time to build winter stores, and you’ll be pouring money into feeding to get them through to spring. You’re essentially paying a full-price nuc to get a survival colony, not a productive one.
Local pickup versus shipped: Buying locally, picking up the nuc yourself, and transporting it in a controlled manner is always preferable. You can inspect the colony thoroughly before paying, and there’s no shipping stress. Call local beekeeping clubs, check your state’s beekeeping association directory, or search online for “nucs for sale near me” to find breeders within a reasonable drive.
If you must buy shipped nucs, only use sellers who specialize in shipping and have good reviews. Shipping is stressful on bees and can cause a week of disruption even if everything goes smoothly. The colony will need time to reorganize after arrival. Some major suppliers like Mann Lake offer shipped nucs with a satisfaction guarantee, which is a valuable safety net if the colony arrives damaged or unhealthy.
Breeder reputation: Before you contact a seller, research them online. Look for reviews on beekeeping forums, ask your local club if anyone has bought from them, and check whether they’re willing to share references. A breeder who’s been selling quality nucs for 5+ years has a track record you can evaluate. New breeders or those with limited online presence are riskier, though sometimes they’re very good; you just can’t verify it as easily.
One particular risk: breeders who sell exclusively by the calendar without regard to actual spring conditions. If it’s late April but the weather has been cold and forage is still light, a responsible breeder will delay nuc sales or warn you that feeding may be necessary. A breeder who ships on schedule regardless of conditions is prioritizing cash flow over colony strength.
Common Mistakes When Buying Nucleus Colonies
Many new beekeepers make the same purchasing errors. Knowing what to avoid can save you money and heartache.
Mistake 1: Buying an undersized nuc. You see a nuc advertised at a discount price. You arrive to inspect it and find only two or three frames with bee coverage. The brood is scattered and light. You think, “I’ll feed them heavy and they’ll bounce back.” Maybe they will, but you’ve just bought a weak colony that will spend six weeks barely keeping pace with brood production. Any illness, varroa spike, or poor weather will set them back another month. What looked like a bargain becomes a liability. A nuc should come with at least 3-4 frames of solid bee coverage, period. If it’s lighter, the price should be discounted by 30-40%, and you should expect to manage it carefully all summer.
Mistake 2: Not clarifying equipment compatibility. You buy a beautiful medium-frame nuc from a specialty breeder, excited to get started. When you get home, you realize your hive body is set up for deep frames. You spend the next three hours troubleshooting how to transfer the frames without breaking comb or injuring bees. Or worse, you leave the nuc in its little 5-frame box too long, and the queen runs out of room, triggering a swarm in July. Before money changes hands, ask the seller: “What frame size and foundation type are these built on? Will they fit directly into my hive box?” Get a clear answer in writing if possible.
Mistake 3: Purchasing from someone who won’t let you inspect. A seller who says “I’ll deliver it sealed, you can’t open it until you get home” is protecting something. Maybe they’ve oversold their inventory and will substitute a weaker nuc at delivery. Maybe the brood pattern is poor and they know it. Maybe they’ve had disease issues. A responsible breeder is proud of the nuc and wants you to see it before you buy. If someone refuses an in-person or video inspection, buy from someone else.
Mistake 4: Ignoring warning signs about queen quality. A nuc shows up with a lot of eggs and larvae, but when you look carefully, there’s also a lot of scattered, empty brood cells and some spotty patterns. The seller says the queen is young and will improve. Maybe. But a young queen with a poor start rarely becomes a strong layer. You’re taking a risk. If the queen pattern is already problematic at purchase, don’t expect it to improve dramatically over the summer. You’ll end up requeening in July, which costs time and money and disrupts the colony. Buy from a breeder who can show you a queen with a solid track record.
Mistake 5: Not having transport and hive equipment ready. You order a nuc for June delivery, but you haven’t picked up a hive box yet. When the colony arrives, you’re scrambling to assemble equipment, clean frames, and find a location. The bees, meanwhile, are packed in a small box in the heat. Stress climbs. By the time you get the hive set up, the colony has suffered unnecessary trauma. Have your hive body assembled, your apiary location ready, and any equipment purchases (like the Dadant Frame & Foundation Nuc Box if you need backup housing) completed before the nuc ships or before you drive to pick it up.
Mistake 6: Buying multiple nucs from the same genetics line. If you’re purchasing two nucs to expand your operation, resist the temptation to buy both from the same breeder on the same day. Yes, it’s convenient. But if both colonies have the same disease or pest problem, or if the queen genetics don’t work in your climate, you’ve lost redundancy. Spread your sourcing. Buy one local, buy one from a breeder in a slightly different region. Get different queen genetics if possible. This guards against total loss.
How to Transport and Install Your Nuc
Once you’ve purchased your nuc and the colony is ready to come home with you, the next few hours are critical. Proper transport and careful installation set the tone for the entire first season.
-
Prepare your transport container. If you’re picking up a local nuc, the breeder will hand you the nuc box. Secure it in your vehicle so it won’t slide or tip if you brake suddenly. On a warm day, crack a window or bring a small battery-powered fan to keep air moving. On a hot day (above 85°F), place a damp cloth on top of the nuc box to allow evaporative cooling and reduce stress. Do not seal the box tightly. The bees need airflow. The trip should be as smooth and quick as possible, ideally under 30 minutes. If you’re buying shipped and the nuc arrives in a cardboard box, follow the shipper’s instructions but generally keep it in a cool, dark place until evening, then open and inspect before installation.
-
Locate your hive in the apiary and ensure the hive box is assembled. Your full-size hive body (deep or medium, depending on what the nuc is built on) should already be sitting on its stand or landing board, level and oriented in the direction the bees will fly out. Have your entrance reducer in place, set to the small opening if it’s early season. Have your inner cover and outer cover ready but not yet installed. Grab a smoker and light it now, before you open the nuc. You don’t need much smoke, but having it ready prevents a frantic scramble.
-
Open the nuc box and assess the frames. Set the nuc box down next to your hive body. Open the nuc gently. Give the bees 30 seconds to calm. Look at the frame arrangement. Identify which frame has the most brood (and the queen, though you might not see her). This is your reference frame. The nuc builder will typically have left frames with empty cells on the outside. You want to preserve the cluster when you move the frames, so you’ll remove one of the outer frames first.
-
Transfer the frames. Remove the outer, lightly covered frame from the nuc and place it in your full-size hive body, positioned at one edge. Next, remove the frames from the nuc in order, placing them in the hive box in the same arrangement, maintaining the cluster. The brood frames should be central. You’ll likely move 4-5 frames into the hive box. After the nuc frames are installed, fill any remaining space in the hive box with empty drawn comb or fresh foundation frames, depending on what you have available. Never leave large gaps; bees cluster and the colony needs frame continuity.
-
Return the hive to full size and feed. Once all frames are in place, install the inner cover and outer cover. If the hive is light (less than 20 pounds full), place a feeder box on top (called a “super” in some contexts, but here it’s just additional space with a frame feeder or entrance feeder). A new nuc will need supplemental feeding for at least two weeks, even if there’s good nectar flow, because the small population can’t gather fast enough to keep pace with the growing colony’s consumption. You’ll need the Natural Beekeeping Nuc Starter or a similar all-in-one feeder setup to simplify this process.
-
Leave the bees alone for the first week. After installation, do not open the hive for at least 7-10 days. The colony is disoriented, the queen needs to reorient to her new home, and the bees are working hard to rebuild their world. Every inspection you make in the first week adds stress and can actually slow the colony’s initial growth. Trust the process. After 10 days, you can peek at the entrance to see if bees are bringing in pollen (a good sign) and check that the feeder is being consumed. At two weeks, do a full inspection to confirm the queen is laying in the new comb.
FAQ
Q: What’s the difference between a nuc and a package of bees?
A package of bees consists of 3 pounds (roughly 12,000 bees) plus a mated queen in a screen cage, all enclosed in a wooden box with food supplies. The bees are typically from a spring hive split, drummed into a box, and shipped. A nucleus colony is a miniature, self-contained hive with a laying queen, some brood in various stages of development, established food stores, and 10,000-15,000 adult bees already working together on their frames of comb. The key difference is that a nuc is a cohesive family with brood and drawn comb already in place, while a package is just bees plus a queen who are strangers to each other. In practical terms, a nuc skips the first 3-4 weeks of slow growth that a package requires. The nuc queen starts laying immediately and the colony begins its life on schedule. A package queen must be released from her cage, accepted by the bees, and then she begins laying; all of this adds delay. For a beginner or someone aiming for a productive colony in a single season, a nuc is almost always the better choice. The cost is similar, both running $100-200, but the outcome is much more predictable. A nuc also eliminates the guesswork of whether the package bees will accept their queen (rare but it happens). You’re buying a proven unit, not a gamble.
Q: How long does it take for a nuc to become a full production hive?
If you install a 5-frame nuc in late April or early May, and the weather cooperates with consistent warm days and good forage, the colony should reach full strength (20,000+ bees occupying a full 10-frame box) by mid-to-late July. From that point, if you don’t split it and there’s strong late summer flow (like a goldenrod bloom in August or September), you might get 20-40 pounds of surplus honey to harvest in the fall. More realistically, a nuc bought in spring will produce 10-20 pounds of harvestable honey its first year if everything goes right. The real payoff comes in year two, when the colony is established and at full strength for the entire season. This is why understanding honey extraction timing is important: you need to manage expectations and know when it’s safe to take honey without compromising the colony’s winter survival. A nuc also frees you from having to split an existing hive; if you’re using nucs as your primary expansion method, you don’t trigger swarming in your main colonies the way you would with splitting a hive to prevent swarming.
Q: Can I requeen a nuc if I don’t like the queen genetics?
Yes, though it’s not ideal for a new colony. A nuc arrives with a laying queen. If after a month or two you decide you don’t like her genetic line (slow build-up, defensive temperament, poor brood pattern), you can requeen. The standard way is to cage the old queen by finding her (which takes practice), releasing a new queen with a candy plug, and waiting 5-7 days for acceptance. The colony will lose a week or two of development time, and requeening always carries a small risk that the bees will reject the new queen. A safer approach: requeen in late summer (August or September) instead of mid-season. By then the colony is already at good strength, requeening is less disruptive, and the new queen has time to build a strong population for overwintering. If you’re particular about queen genetics, buy from a breeder who shows you the genetics upfront and ask them to mark the queen (most breeders will for a small fee or automatically). A marked queen makes her easy to find for inspection and future requeening decisions. Many experienced keepers have standing orders with a single trusted breeder so they get consistent genetics year after year.
Q: What should I do if my nuc shows signs of disease after I bring it home?
If you notice American foulbrood (AFB), indicated by a slimy, brown residue in cells with a distinct rotting smell, or chalkbrood (mummified larvae), notify your state bee inspector immediately. These are reportable diseases and in many states, there are quarantine and treatment protocols. Do not move the hive. Stop working other colonies until you’ve decontaminated your tools. AFB in particular requires destruction of the infected colony (burning), and frames cannot be salvaged. It is a serious, state-managed disease requiring professional oversight. For other issues like nosema or varroa (which are harder to diagnose visually), start monitoring with alcohol washes or sticky boards and begin treatment according to Dadant’s apiary science resources and your local extension guidelines. A responsible seller will often offer to replace a nuc that shows disease signs within the first 30 days. Get this in writing before you buy. If the disease is present but you didn’t see it on inspection (for example, a hidden AFB comb in the back), the seller should stand behind their product and provide a replacement. If they refuse and blame you for poor management, that confirms they weren’t trustworthy to begin with.
Conclusion
Buying a nuc is a straightforward decision if you know what to look for. Check the brood pattern, count the frames of bee coverage, verify that the queen is laying eggs, confirm that food stores are present, and ask directly about pest and disease history. Make sure the frame type and foundation match your hive setup. Buy in late April or May if you can, and source locally if possible. Have your hive equipment ready before pickup day, and install the nuc with care, allowing the colony to settle without interruption for the first week.
A good nuc will build itself into a productive hive by mid-summer. A poorly chosen nuc will lag all season and cost you more in time and supplemental feeding than any upfront savings. The price difference between a weak nuc and a strong one is often only $20-30, but the outcome difference is a full season of lost productivity or worse. Trust the inspection process, walk away from sales that feel opaque, and buy from breeders who stand behind their work.
Your next strong hive starts with the right purchase. Make it count.
Did this guide help? Drop a comment below, or subscribe to get the next post straight to your inbox.