Best Beekeeping Tools for Backyard Hobbyists: A Complete Buyer's Guide
This post contains affiliate links. As an Amazon Associate, I earn from qualifying purchases at no extra cost to you.
Starting beekeeping without the right tools is a reliable way to lose confidence early. The bees don’t care if you’re prying apart propolis-sealed boxes with a tool that bends, or firing up a smoker that goes cold three frames into an inspection. Good equipment doesn’t make you a good beekeeper, but poor equipment creates friction at every step that makes the learning process harder than it needs to be.
If you’re getting started and want to buy a solid foundation in one move, the Honey Lake 31Pcs Beekeeping Supplies Starter Kit with Bee Suit bundles essential tools together, which is hard to beat for a first purchase.
This guide covers each essential beekeeping tool in depth, explains what to prioritize at different stages of your practice, and gives you specific product recommendations that hold up at backyard scale.
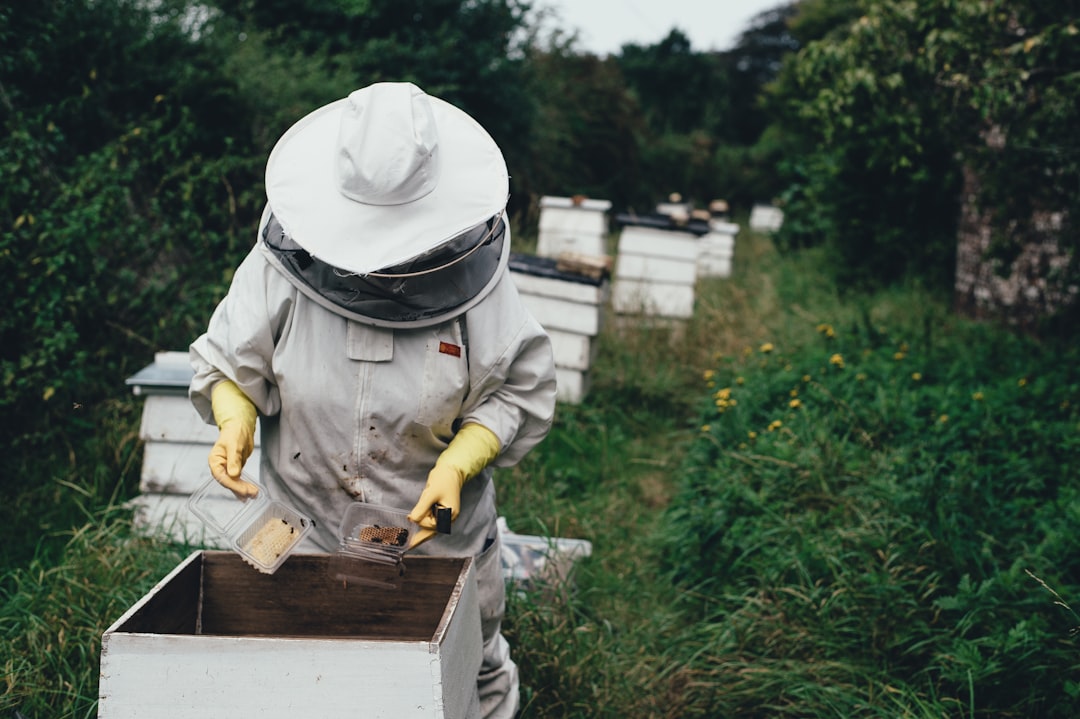
Photo by Annie Spratt on Unsplash
The Essential Beekeeping Tools Every Hobbyist Needs
Before getting into product specifics, it’s worth understanding what each tool actually solves in practice. Beekeeping is a physical activity. You’re breaking hardened propolis seals, lifting frames that can weigh eight or more pounds when fully capped with honey, and managing a colony that monitors your movements and responds to disruption. Every item in the core kit exists to handle a specific mechanical or behavioral problem, not to fill out a supply list.
The hive tool is the foundational instrument of beekeeping. Bees seal every gap in the hive with propolis, a resinous compound they collect from tree buds and bark that hardens over time and bonds wooden surfaces together with considerable strength. Without a hive tool, you cannot separate hive bodies, break apart frames, or lift individual frames for inspection. You’ll need one before your very first visit to the hive, and you’ll reach for it on every single visit for as long as you keep bees.
The smoker is your primary behavioral management tool. Smoke does not sedate bees. It triggers a feeding response that redirects their attention and, more importantly, it masks alarm pheromones that would otherwise recruit defensive behavior from guard bees. A smoker that produces cool, dense white smoke reliably is worth paying for. One that burns hot, goes out mid-inspection, or produces thin wisps actively works against you.
The frame grip solves a handling problem that becomes obvious the first time you lift a propolis-coated frame in heavy gloves. Frames are slippery. A frame grip gives you a secure mechanical hold that prevents dropping a frame of capped brood, open larvae, or honey. For beginners who haven’t yet developed the proprioceptive confidence for bare-hand or thin-glove work, the frame grip is as important as the hive tool.
The bee brush lets you gently clear bees off a frame before replacing it or closing the hive. It’s the least critical of the four but earns its place in every inspection kit. A soft-bristle brush used with a single sweeping motion is the standard recommendation from extension services because technique consistency matters as colony population grows.
These four items are what you actually need before your first hive inspection. Everything else in the beekeeping catalog comes later, when specific hive management needs make individual additions worth considering.
Hive Tools: The One Beekeeping Tool You Cannot Inspect Without
A hive tool is a short pry bar designed for the leverage geometry of a Langstroth hive. Two profiles dominate the market: the flat-blade and the J-hook. Understanding the practical difference between them matters because they solve different handling problems, and most hobbyists eventually develop a strong preference.
| Feature | Flat-Blade Hive Tool | J-Hook Hive Tool |
|---|---|---|
| Prying hive bodies apart | Excellent | Good |
| Lifting frames by the ear | Awkward (needs two hands) | Excellent (one hand) |
| Scraping propolis buildup | Good | Good |
| Splitting stuck frames | Good | Good |
| Best use case | Box separation, bulk scraping | Full solo inspections |
| Recommended for beginners | As a secondary tool | As the primary tool |
Flat-blade tools work well for prying apart boxes and scraping heavy propolis deposits off the tops of frames and box edges. The wide, thin blade slides cleanly into propolis joints. The limitation is that lifting individual frames requires repositioning your grip or using your free hand to assist, because the flat blade doesn’t give you purchase under the frame ear.
J-hook tools add a hooked end that catches under the frame ear and levers the frame upward cleanly with one hand. For solo inspections, which describes the majority of backyard beekeeping sessions, the J-hook is significantly more practical. You can pry with the flat end and hook-lift with the J end without switching tools or repositioning. Most keepers who have used both profiles settle on the J-hook as their everyday primary.
The Acostop Bee Hive Tool Stainless Steel J Hook & Soft Brush for Beekeeping is the practical pick for most hobbyists. Stainless steel construction resists rust and corrosion, which matters for longevity. The J-hook end is well-proportioned for standard Langstroth frame ears. It’s the right tool to start with and keep as your primary for multiple seasons.
Dadant & Sons, one of the oldest beekeeping supply houses in North America, carries several hive tool profiles with useful comparative descriptions if you want to evaluate additional options before committing. Their catalog notes are a solid reference for understanding how different geometries behave in practice.
Hive Tool Maintenance
Propolis buildup isn’t just aesthetic. A heavily coated blade becomes less precise over time and can carry disease material between hives. Scrape the bulk of propolis off after each inspection, then flame-sterilize with a small butane torch or dip in isopropyl alcohol before moving to a second hive. This is standard biosecurity practice and takes under a minute.
Keep a spare hive tool in a fixed location. Hive tools have a reliable tendency to disappear into tall grass, get left on the landing board, or end up buried under frames during harvest. Having a second tool in a dedicated spot means you’re never opening a hive without one.
For context on what you’re actually doing during the inspection where your hive tool earns its keep on every frame lift, see our guide on your first hive inspection: what to look for.
Beekeeping Smokers: Your Most Important Hive-Opening Investment
A smoker is the one piece of equipment where paying for quality has the clearest, most immediate return. Budget smokers share a predictable set of failure modes: thin metal walls that warp and burn through, bellows that crack or delaminate within one season, inadequate internal airflow that lets fuel smolder and die mid-inspection, and no heat shield on the barrel. A smoker that fails during an open-hive inspection forces you to close up fast, often before you’ve finished what you started.
You’ll need a smoker that actually works. The Mann Lake Stainless Steel Bee Smoker Pro Bellow is the recommendation here. It’s built from stainless steel with a heat guard, which helps protect your hive boxes, protective gear, and arm when you set it down between frames. It’s designed for reliable performance across multiple seasons of use. Mann Lake is a major commercial-scale supplier and this smoker is built to that standard, which makes sense for serious hobbyists.
Fuel Selection and Smoke Quality
Fuel choice has a more significant effect on smoke quality than most beginners anticipate. The goal is cool, dense, white smoke produced in quantity. Different fuels produce very different results, and some popular options have real downsides.
- Untreated burlap is the most consistent general-purpose fuel. It burns clean and cool, produces voluminous white smoke, and maintains a reliable smolder. Extension service recommendations consistently favor untreated burlap or cotton as the baseline.
- Wood pellets (untreated, hardwood) have become a popular choice among experienced keepers. They light easily, burn well, and produce good smoke volume with manageable heat output.
- Pine needles work and are convenient if you have a source, but they run hotter than burlap. Use them in combination with a slower-burning material rather than as your sole fuel.
- Dried sumac and similar plant materials produce pleasant-smelling smoke and work acceptably, but consistency varies considerably with dryness and packing density.
Avoid anything treated, painted, varnished, or of unknown origin. The bees process the smoke that enters the hive, and chemical contamination from treated wood or synthetic materials is a real concern.
Smoker Sizing
Hobbyist smokers typically come in 4x7 inch and 4x10 inch configurations (barrel diameter by height). For one to three hives, the 4x7 configuration is adequate for a normal inspection session. If you’re running four or more hives or doing longer sessions, the 4x10 gives you more fuel capacity and longer burn time between refuels. The Mann Lake smoker is a 4x7, which is the right size for backyard-scale operations.
For the complete technique on loading, lighting, and producing the right smoke output through a full inspection, the dedicated post on how to use a smoker properly covers the process in full detail.
Frame Grips, Bee Brushes, and What to Buy as a Beginner Starter Kit
These tools occupy the second tier of the kit. They’re not optional, but the consequences of quality failure are more forgiving than a smoker that goes cold or a hive tool that bends. That said, there are clear differences between adequate and poor choices in both categories.
Frame grips work on spring tension. Squeeze the handles to open the jaws, position over the frame top bar, release, and the grip locks onto the frame. The failure mode in cheap frame grips is weak spring tension that loses its hold under the weight of a full honey frame, or narrow jaws that don’t seat securely on standard top bar dimensions. A frame grip that releases mid-lift drops the frame, which can destroy capped brood, crush bees, and in the worst case send the queen to the ground. Grab a frame grip with rated holding capacity and wide jaw geometry.
Bee brushes should have soft, flexible bristles that move bees without rolling or injuring them. Stiff-bristle brushes press bees together in a cluster, which agitates rather than calms. The right technique is a single, deliberate sweep that moves bees as a group rather than pushing individuals into each other. Natural-bristle brushes have a strong track record for this reason, though quality synthetic options exist that perform comparably.
The Honey Lake 31Pcs Beekeeping Supplies Starter Kit with Bee Suit packages beekeeping tools together, making it the logical first purchase for new hobbyists. The kit includes essential components suitable for backyard-scale operations. The tools are appropriate for standard inspection work. For new beekeepers who want to get through the first season without piecemeal shopping, this kit removes the decision friction by providing core tools you’ll need.
When to Upgrade Individual Tools
The starter kit approach makes sense for your first season. By your second season, you’ll have done enough inspections to know exactly which tools feel natural and which create friction in the real handling environment. At that point, targeted upgrades are worth making:
- If the frame grip feels imprecise or releases unexpectedly on heavy frames, move to a heavier-duty model with wider jaws and stronger spring tension.
- If your bee brush seems to agitate more than it calms, switch to a natural soft-bristle model.
- Keep the hive tool from the starter kit as a backup. The moment you’re glad you have a second one is the moment you drop the primary into the grass mid-inspection.
Starter kits buy functional equipment and practical experience. Let that experience drive specific upgrades rather than buying premium versions of everything before you’ve established which items actually matter in your setup.
How to Build Your Beekeeping Tool Kit: A Step-by-Step Approach
Acquiring tools in the right order matters, especially on a constrained budget. Many beginners over-invest in specialty equipment before they’ve built the fundamental handling skills that only the core four tools develop. Here’s the logical sequence:
-
Before your first hive arrives, gather the core tools. You need a hive tool, a smoker, a frame grip, and a bee brush before you open anything. The Honey Lake 31Pcs Beekeeping Supplies Starter Kit with Bee Suit provides multiple tools for beginner beekeepers. Pick up the Mann Lake Stainless Steel Bee Smoker Pro Bellow separately. These two purchases give you the tools you need for your first inspection.
-
Before your first ten-frame full inspection, upgrade the hive tool if needed. If the hive tool in your starter kit feels short, lacks a J-hook, or doesn’t give you confident leverage on frame ears, pick up a dedicated Acostop Bee Hive Tool Stainless Steel J Hook & Soft Brush for Beekeeping before you’re navigating a full deep box. The J-hook pays off immediately in solo inspections.
-
After your first full active season, evaluate your friction points. Frame grip handling, brush technique, and hive tool feel all become clearer after 20 or more inspections. Identify what creates hesitation in practice, and upgrade those specific items.
-
When you expand to two or more hives, buy a second core kit. Running two hive setups with a single smoker creates a workflow problem. A second smoker and a second hive tool at the second hive location means you’re not carrying equipment across the yard between inspections.
-
When varroa monitoring becomes a regular practice, add sampling materials. A mite wash requires a mixing bowl, a fine strainer, and rubbing alcohol. These are cheap but non-negotiable additions once your colonies are established and monitoring is in rotation.
-
When your hives are producing surplus honey, add extraction equipment. Uncapping knives, extractors, and straining equipment are a separate investment category. Don’t buy this equipment before you’ve confirmed that your hives are building surplus beyond their winter stores.
Following this sequence prevents the common mistake of spending heavily on specialized equipment before developing the basic handling skill that only the core tools build.
Common Beekeeping Tool Mistakes That Cost Beginners Time and Bees
Most tool-related problems in backyard beekeeping follow a small number of recurring patterns. Knowing them before your first season saves real losses.
Buying the cheapest smoker available. This is the single most common and consequential tool mistake. A cold smoker mid-inspection is not a minor inconvenience; it means trying to close an open, agitated hive with no behavioral management tool active. A budget smoker that burns hot, goes out unpredictably, or fails within a season costs more in disrupted inspections and stressed colonies than the initial savings. The Mann Lake smoker costs more than the cheapest options on the market. That difference buys a smoker that does not fail during your inspections. Buy the right smoker first.
Using a flat-blade tool for frame lifting. Flat blades are genuinely good for prying apart boxes. They are awkward for lifting frames. Many beginners spend their first season using both hands on every frame lift because their tool doesn’t give them mechanical leverage under the frame ear, and they assume this is just how it works. It isn’t. The J-hook solves this problem entirely. If your current tool makes frame lifting feel uncertain, switch tools rather than attributing the problem to your technique.
Skipping tool sterilization between hives. A hive tool that travels between hives without sterilization is a direct contamination vector. American foulbrood, caused by Paenibacillus larvae spores, is one of the most serious bacterial diseases in managed colonies and the spores are extremely durable. They survive on metal surfaces and can transfer between hives on a contaminated tool during the same inspection session. An alcohol wipe or 30-second flame sterilization between hives costs nothing and is standard practice from virtually every major apicultural extension program.
Not using a frame grip as a beginner. Some new keepers skip the frame grip and go straight to bare-hand or thin-glove handling, assuming they’ll adapt faster. Experienced keepers who’ve developed the muscle memory for full-hand frame gripping have earned that approach. Beginners haven’t. A dropped frame of capped brood is a serious setback. Dropped frames crush bees, damage brood, agitate the colony significantly, and in bad cases send the queen to the grass. A frame grip prevents that failure mode entirely. Use it until your handling is reliable without it.
Over-smoking because of a bad smoker. This is technically a technique problem, but it’s usually caused by equipment. A smoker that threatens to go cold encourages excessive bellows pumping to keep it active. The result is a hive flooded with heavy smoke that drives the queen down, disrupts normal colony behavior, makes the queen harder to locate during inspections, and stresses bees unnecessarily. A quality smoker that maintains a reliable burn at low bellows input means a few calm puffs at the entrance and under the cover is all you need. If you find yourself pumping continuously, the problem is the smoker.
Leaving tools balanced on the hive between uses. A hive tool left on a box edge during inspection will eventually fall into the grass, develop a propolis-and-dew crust, or get left behind. Store your tools in a dedicated spot, whether that’s a tool belt, a jacket pocket, or a small box on a nearby table. Consistency in storage prevents the mid-season scramble of replacing a lost tool right before an inspection.
FAQ
What beekeeping tools do I absolutely need before my first hive inspection?
Four tools are non-negotiable before you open a hive: a hive tool, a smoker, a frame grip, and a bee brush. The hive tool breaks propolis seals and gives you leverage to pry apart boxes and lift frames; without one, you physically cannot access the inside of a functioning hive. The smoker triggers a feeding response that redirects bee attention and masks alarm pheromones, making the colony substantially calmer and easier to work with. The frame grip gives you a secure mechanical hold on frames, which is critical when you’re working in gloves and haven’t yet built the muscle memory for confident bare-hand handling. The bee brush lets you move bees off a frame before replacing it or closing the hive without rolling or crushing them. Protective gear aside, these four items cover everything you need for a basic inspection. Nothing in the extended beekeeping catalog is required until you’ve established your hive management routine and start encountering specific challenges that call for additional equipment.
What is the difference between a J-hook and a flat-blade hive tool, and which one should I buy?
The flat-blade hive tool is the traditional profile: a thin, flat pry bar that works well for splitting hive bodies, scraping propolis, and prying apart boxes. Its wide blade creates excellent leverage for the prying motion. The weakness is that lifting individual frames from a box requires repositioning your grip because the blade doesn’t give you purchase under the frame ear. The J-hook adds a curved end specifically designed to hook under the Langstroth frame ear and lever the frame upward with one hand. In practice, the J-hook covers both prying and frame-lifting functions without switching tools or repositioning, which is a meaningful advantage during a solo inspection where both hands are often occupied. Most experienced backyard keepers who have used both profiles settle on the J-hook as their everyday primary. The flat-blade remains useful as a secondary tool for heavy scraping or stubborn box joints, but for a single starting purchase, the J-hook is the more versatile choice for the actual inspection workflow.
How do I keep my smoker lit through a complete hive inspection?
Consistent smoke output through a full inspection comes down to three factors: fuel selection, packing technique, and starting method. Use a dry, dense fuel, with untreated burlap being the most reliable general-purpose option because it burns cool, produces voluminous white smoke, and smolders steadily rather than flaring and dying. Pack the fuel firmly but not so tightly that you restrict airflow; a medium-density pack with enough air movement to sustain combustion is the target. Start with a small, fast-catching base fire of crumpled newspaper or dry grass at the bottom of the smoker, let it establish for 30 seconds, then add your main fuel in layers, puffing the bellows between additions to keep the fire active as you pack. A well-designed smoker with adequate bellows capacity should stay lit with only occasional puffs every few minutes during an inspection. If your smoker dies mid-session consistently, the causes are almost always damp fuel, a fuel pack that’s too loose, or a smoker with inadequate bellows or vent geometry. Quality construction makes this fundamentally easier to manage.
Do I need to sterilize my hive tool between different hives?
Yes, and the recommendation from extension service guidance and most apicultural associations is to treat this as standard practice rather than a precaution reserved for suspected problem hives. American foulbrood is the clearest reason: the spores of Paenibacillus larvae are highly resistant, survive on metal surfaces, and can transfer between hives on a contaminated hive tool during the same inspection session. Once established, American foulbrood is one of the most serious colony diseases to manage and in most jurisdictions requires colony destruction rather than treatment. The prevention protocol is simple: carry a small bottle of isopropyl alcohol for a dip-and-wipe routine between hives, or use a small butane torch for flame sterilization. Neither adds more than 30 seconds per transition. This practice becomes especially important when inspecting newly acquired colonies alongside your established hives, when inspecting any hive that shows unusual brood patterns, or any time you’re working through multiple hives in a single session.
Conclusion
The beekeeping tool kit for a backyard hobbyist really is as short as it sounds: a hive tool, a smoker, a frame grip, and a bee brush. The places where quality has the most obvious and immediate impact are the smoker and the hive tool, because those are the instruments you depend on for basic hive access and behavioral management on every inspection.
Start with the Honey Lake 31Pcs Beekeeping Supplies Starter Kit with Bee Suit for your essential tools and first hive tool. Grab the Mann Lake Stainless Steel Bee Smoker Pro Bellow separately for reliable performance that won’t let you down mid-inspection. Upgrade to the Acostop Bee Hive Tool Stainless Steel J Hook & Soft Brush for Beekeeping when you’re ready for a dedicated primary tool. That’s the kit. Open your hives, learn your colonies, and let the tools fade into the background where good equipment belongs.
Found this guide useful? Bookmark it for your next gear decision, and leave a comment below if you have questions about any of the tools covered here.
Related Reading