How to Prepare Your Apiary for Winter
This post contains affiliate links. As an Amazon Associate, I earn from qualifying purchases at no extra cost to you.
Winter is the critical season that separates beekeepers who succeed long-term from those who repeatedly lose colonies. Most winter losses aren’t caused by cold itself—they’re caused by inadequate food stores, moisture buildup, poor ventilation, or miscalculation during fall preparation. The difference between a thriving spring and a collapsed colony often comes down to decisions you make starting in July and August.
This guide covers the specific, actionable steps you need to take to winterize your apiary properly. You’ll learn how to assess your colony’s readiness, feed strategically, manage moisture, and troubleshoot the most common preparation mistakes that beekeepers make.
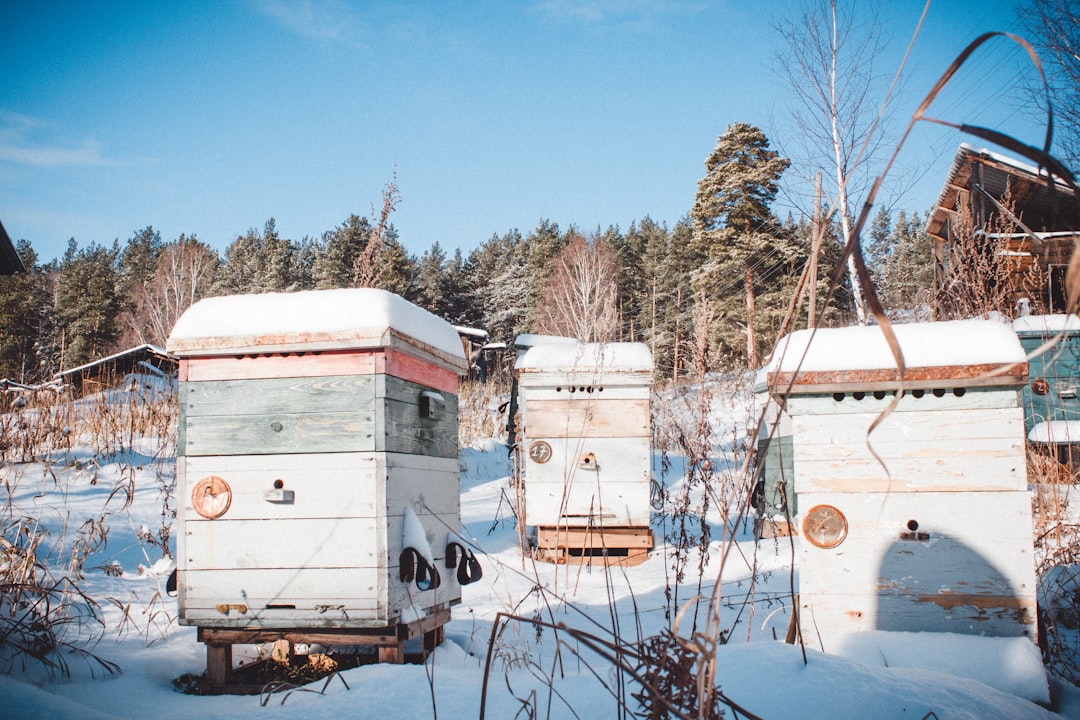
Photo by Unsplash Photographer on Unsplash
Understanding Winter Challenges for Your Bees
Before you can prepare effectively, you need to understand what your colony faces during winter. Most beekeepers think of cold as the primary threat, but temperature management is actually the least of your concerns if you’ve prepared correctly. Your bees are remarkably efficient at generating and maintaining hive warmth through cluster behavior. A well-supplied colony can survive 20-below-zero temperatures without additional insulation.
The real killers are hunger and moisture. A colony that runs out of honey during January dies even though the temperature might warm above freezing. Starvation can strike quickly—a cluster of 30,000 bees consuming 3-4 pounds of honey weekly means you need 12-16 pounds in reserve for a 4-month winter in cold climates. Moisture is equally deadly. Warm bees produce condensation inside the hive. This moisture migrates upward and condenses on the cooler roof, then drips back down as cold water on the cluster, chilling and killing bees. A dry hive with poor ventilation becomes a death trap.
Your colony also needs to minimize energy expenditure. Drafts and air leaks force bees to work harder to maintain cluster temperature, burning through food stores faster. Small entrances are critical—they allow your bees to defend against robbers while reducing drafts that would otherwise chill the perimeter of the cluster.
The timing of winter preparation matters significantly. Early fall, starting in August, is when you need to assess hive health, evaluate food stores, and start supplemental feeding if needed. Mid-fall, in September and October, is when you make structural changes like adding insulation and reducing entrances. Late fall, November onward, is for final inspections and any last-minute adjustments, though at this point most damage from inadequate preparation is already done.
Fall Feeding: Essential Preparation for Winter Survival
The most critical aspect of winter preparation is ensuring your colony has adequate food reserves. Most expert recommendations suggest 60-80 pounds of honey for a two-deep hive in cold climates, or 40-50 pounds for single-deep setups. If your region rarely gets below freezing, 30-40 pounds may suffice, but it’s always safer to have more.
Assess your food stores in late August or early September by weighing the hive or estimating weight by lifting the brood box and honey supers. A pound of honey occupies roughly one medium frame fully capped. If you’re short on stores, supplemental feeding is essential. Don’t wait until October to start this process—bees need time to consolidate fed syrup into proper honey stores, and late feeding can disrupt the hive as bees process liquid that should already be cured.
For supplemental feeding, a 2:1 sugar-to-water ratio (by weight) closely approximates the concentration of nectar that bees would store. This mixture is less taxing on bees than thinner solutions and requires less processing. Boil water, dissolve the sugar completely, let it cool, then add it to your feeder. Use a Stainless Steel Bee Feeder Top Mount placed directly on the inner cover, or a division board feeder inside the box. Top-mounted feeders are less disruptive and allow bees to access feed without opening the hive repeatedly.
Start feeding in early September and continue until bees stop consuming syrup—usually when they sense incoming winter conditions. In most climates, this means feeding through late September and October. If bees are still taking syrup in November, continue feeding, but understand that supplemental feeding late in fall is risky; the colony may not process it into proper stores before a hard freeze.
Pollen stores are equally important. Bees need pollen for brood rearing in late winter and early spring. If your fall is unusually dry or short on blooms, consider pollen patties. Dadant and other suppliers offer pollen supplements that stimulate brood rearing without excessive consumption. Place patties directly on top of the cluster in November and leave them through March in northern climates.
Insulation and Moisture Control: Preparing Your Hives for Cold
Insulation and moisture management work together to create a survivable winter environment. Insulation reduces temperature fluctuations that drain the colony’s energy reserves. Moisture management prevents the condensation that kills bees in January.
A common misconception is that insulation keeps the hive warm. It doesn’t—it prevents heat loss and maintains the warmth the bees themselves generate. The cluster temperature near the queen can stay at 80-90°F even when the surrounding air is well below zero, but only if insulation slows heat loss to manageable levels.
For top and side insulation, the Bee Hive Insulation Wrap Moisture Quilt is specifically designed for this purpose. These quilts fit over the inner cover and provide both insulation and ventilation. The quilt sits above the inner cover, creating an air gap that insulates while allowing moisture to escape. You can also build a moisture quilt yourself: fill a shallow box or frame with wood shavings, straw, or pine needles (not leaves—they compact and trap moisture), and place it on top of the inner cover. This simple setup costs $10-20 per hive and dramatically improves winter survival.
Wrap the sides of your hive with tar paper or reflective wrap if temperatures regularly drop below 20°F. The wrapping should cover the sides and back but leave the entrance clear. Avoid plastic-based wraps that trap moisture; tar paper or burlap allows some moisture exchange while reducing wind-driven heat loss. If you’re in an extremely cold climate (below minus-10°F regularly), consider building a windbreak or snow bale structure around your apiary.
Bottom board ventilation is essential. A solid bottom board without an inner cover screened area can become a moisture trap. The inner cover should have a small ventilation hole (1/4-inch diameter) that allows moisture to escape upward. This is critical—without this hole, moisture condenses on the roof and drips onto the bees.
Never insulate the bottom of the hive. Bees need a dry floor, and insulating the bottom traps moisture that should escape. The goal is to insulate the top and sides while allowing moisture to escape from the bottom.
Ventilation and Entrance Reduction: Maintaining Winter Warmth
Ventilation seems contradictory to insulation, but both are necessary. Your hive needs to allow moist air to escape the cluster while preventing cold drafts. The key is placing ventilation above the cluster, not below it.
An inner cover with an escape hole provides the necessary ventilation. Some keepers also drill small holes near the top of the hive boxes (in the upper box of a two-deep setup) to improve airflow without creating drafts in the cluster area. These holes should be no larger than 1/8 inch—small enough that bees can’t easily use them as robber entrances but large enough to allow moisture escape.
The entrance is your primary defense against both robbers and drafts. A full entrance in fall is dangerous. Robber bees from stronger colonies or wasps can overwhelm a weakening colony, and a large entrance lets cold air bypass the guard bees and pour directly into the hive. Reduce your entrance significantly in October.
Use the Mann Lake Entrance Reducer for Bee Hive, which provides a smaller hole that bees can defend effectively. A two-hole entrance (one hole per side) or a single 3/8-inch hole is ideal for most situations. If your colony is very weak, reduce further to a single 1/4-inch hole.
Check your entrance weekly in fall to ensure it isn’t clogged with dead bees or other debris. A blocked entrance can suffocate the colony. If you see piles of dead bees at the entrance, increase the entrance size slightly and ensure adequate ventilation, as this suggests moisture problems.
Your Winter Preparation Checklist: 8 Essential Steps
Winter preparation follows a sequence. This checklist ensures you don’t miss critical steps and helps you time each action appropriately.
-
Assess food stores (late August). Lift each hive to estimate weight, or count frames of capped honey. If you have fewer than 60 pounds in a two-deep setup, plan supplemental feeding.
-
Start feeding if needed (early September). Prepare 2:1 syrup and feed continuously until bees stop consuming. Use a top-mounted feeder to minimize hive disruption.
-
Treat for varroa mites (August-September). Mites stress colonies and increase winter losses dramatically. Use Apivar, formic acid, or another approved treatment. Apply before temperatures drop, as many treatments are less effective in cool weather. Refer to Penn State’s varroa management guide for current treatment protocols.
-
Reduce the entrance (October). Install an entrance reducer that allows only enough space for bees to enter single-file. This prevents robbing and reduces drafts.
-
Add moisture management (October). Place an inner cover with a ventilation hole in the top box, or install a moisture quilt on top of the inner cover. This step is non-negotiable.
-
Add insulation if needed (November). For climates with regular freezing, wrap sides and back with tar paper. In extreme cold, build a windbreak.
-
Add pollen supplements if fall is short on blooms (November). Place pollen patties directly on top of the cluster. Leave them through March in northern climates.
-
Final inspection (December). Check for signs of moisture, debris in the entrance, and overall colony condition. This is the last time you should open the hive until spring.
Common Winter Preparation Mistakes to Avoid
Experienced beekeepers and beginners both make winter preparation mistakes that cost colonies their lives. Understanding these errors helps you sidestep the same pitfalls.
The most common mistake is inadequate food stores combined with overconfidence. Many beekeepers assume their bees have enough honey without actually weighing or counting frames. They then discover in February that the cluster has starved into an empty super, unable to move to the stores just inches away. Always verify your food stores by weight or frame count. If you’re uncertain, feed.
A second major error is failing to manage moisture. Keepers who don’t install an inner cover ventilation hole or moisture quilt often see condensation and mold inside the hive by January. By February, the cluster is wet and weakened. Moisture management is not optional in any climate colder than 40°F during winter.
Insulating the bottom of the hive, which some beekeepers do intending to help, actually traps moisture and creates a damp environment. The bottom should be open or screened, always. Insulation belongs on top and sides only.
Blocking the entrance entirely is another mistake. Some keepers wrap the entrance completely or block it with a plug, thinking they’re protecting the hive. A completely blocked hive becomes a pressure cooker of moisture. Bees always need at least a small entrance, even in the coldest weather.
Starting supplemental feeding too late is also problematic. Bees need time to ripen syrup into honey and store it properly. If you start feeding in late October, the colony may be consuming syrup-fed food all winter, which is less efficient than proper honey. Feed by early September if you’re going to feed at all.
Lastly, avoid opening the hive to inspect it after November. Every inspection breaks the cluster, forces bees to generate heat to warm it again, and consumes energy reserves. Once you’ve completed your fall preparation, leave the hive alone until late March or early April, when it’s warm enough that inspection doesn’t harm the colony.
Frequently Asked Questions
How much honey does my colony need to survive winter?
In cold climates (below 20°F regularly), plan for 60-80 pounds of honey in a two-deep hive, or 40-50 pounds in a single-deep setup. Each pound of honey occupies one medium frame fully capped. In milder climates where temperatures rarely drop below freezing, 30-40 pounds may suffice, but there’s no penalty for having more. You assess stores by counting capped honey frames or estimating hive weight. A full deep frame of capped honey weighs about 5-6 pounds; a medium frame about 4 pounds. If you have six full deep frames of capped honey, that’s approximately 30-36 pounds per box. For a two-deep setup, you want at least 10-12 full frames of capped honey distributed across both boxes to be safe. The most reliable method is weight: a fully stocked two-deep hive should weigh at least 90 pounds by November. Use a bathroom scale to weigh the hive. Place a scale under each corner of the hive, note the readings, and multiply by four for the total.
Should I treat my colony for mites before winter?
Yes, absolutely. Varroa mites are the single biggest threat to winter survival outside of starvation. Mites weaken bees, spread disease, and cause colonies to crash during the winter months. Apply miticides in August or September, before temperatures drop. The two most common approaches are Apivar strips (left in the hive for 42 days) and formic acid treatments like MAQS (Mite Away Quick Strips). Both are effective when applied correctly and at the right temperature. If you don’t treat, expect to lose 20-30% of your colonies to mite-related problems. Treated colonies have dramatically better survival. Check treatment recommendations with your local extension office for the best option in your area.
Can I feed my bees all winter, or do they need solid honey stores?
Bees strongly prefer solid honey stores, and feeding during deep winter is generally ineffective. Once temperatures drop significantly, bees form a tight cluster and rarely venture out to feeders. Any syrup you add in January will sit untouched and potentially freeze. The time to feed is August through October, while temperatures are still warm enough for bees to process syrup into honey. If your colony is short on stores, you can add a food patty (fondant or granulated sugar) directly above the cluster in November. This stays with them through winter and provides an emergency food source if the cluster moves away from their stored honey. But proper preparation—ensuring adequate honey stores by October—is far better than trying to feed in deep winter. Feed in fall when conditions allow bees to process it properly.
Conclusion
Winter preparation begins in August and requires a sequence of specific actions: assessing food stores, feeding if necessary, treating for mites, reducing the entrance, adding moisture management, and insulating if you live in a cold climate. Each step matters, and skipping any one of them increases your risk of winter loss.
The difference between a successful winter and colony loss often comes down to whether you completed these tasks thoroughly and on schedule. Bees are resilient animals, but they need you to prepare their home properly. Start with an honest assessment of your food stores. If you’re short, feed immediately. Add moisture management next—this single step prevents more winter losses than any other. Reduce the entrance, add insulation if appropriate for your climate, and treat for mites. By early December, your bees should be in the best possible position to survive until spring.
The time investment is minimal—a few hours in fall can mean the difference between losing half your colonies or keeping them all. This is where beekeeping skill shows itself.
Got questions about winterizing your apiary? Drop a comment below or subscribe to our feed for more practical beekeeping guidance.
Related Reading
```