Understanding honey extraction: when and how to harvest
This post contains affiliate links. As an Amazon Associate, I earn from qualifying purchases at no extra cost to you.
The culmination of a beekeeping season rests entirely on the success of the harvest. For the backyard beekeeper, the pressure to extract honey at the peak of the nectar flow is balanced against the biological needs of the colony. Harvesting too early results in watery, fermenting honey that cannot be stored. Harvesting too late or taking too much can leave a colony to starve during the winter months. To manage this process effectively, you must understand the specific indicators of ripeness and have a methodical approach to removing and processing the frames. Success is not measured by the total volume of honey produced but by the quality of the final product and the continued health of the hive.
Before you begin the physical labor of the harvest, you must have the right tools ready to handle the sticky reality of the job. For a small scale operation, you should pick up a Beekeeping Uncapping Scratcher to manage low spots on the comb where a standard knife might miss. Having these small hand tools ready prevents delays once the bees are cleared from the supers. You must commit to a schedule that allows for extraction within twenty four to forty eight hours of removing the frames from the hive to prevent pests like small hive beetles from ruining the crop.
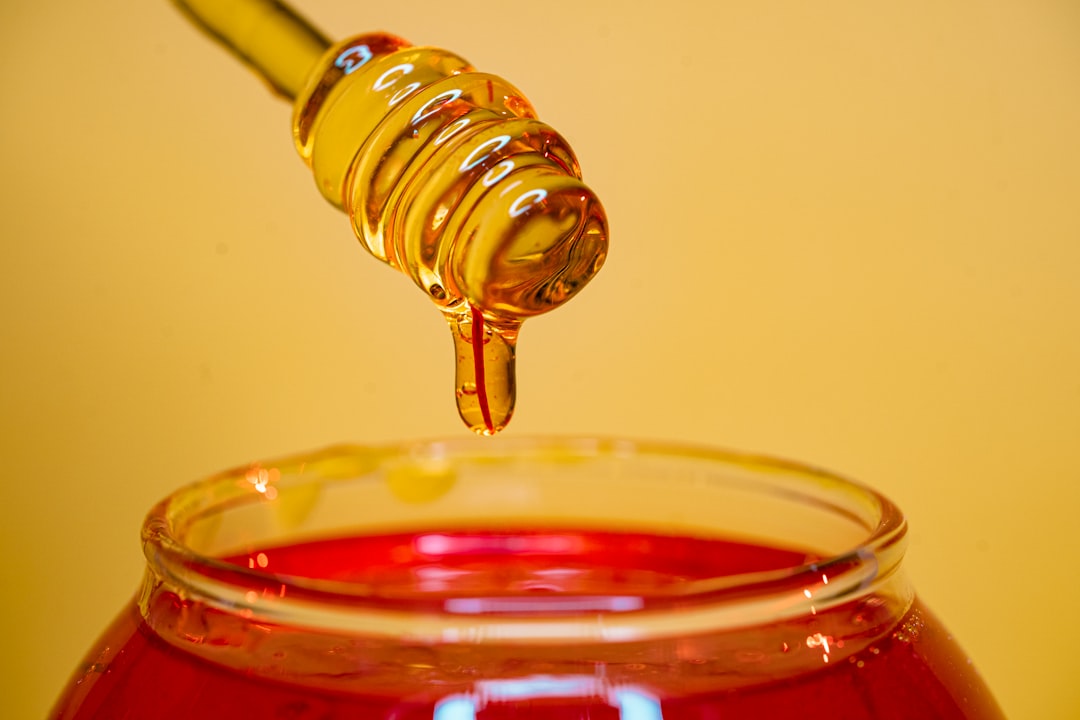
Photo by Benyamin Bohlouli on Unsplash
Determining the Right Time for Honey Extraction
Timing the harvest is a matter of moisture management and colony assessment. Honey is nectar that has been dehydrated by the bees until the water content is below 18.6 percent. At this level, the osmotic pressure is high enough to prevent yeast from fermenting the sugars. Bees signal that the honey is ready by capping the cells with a thin layer of beeswax. The standard industry recommendation is to wait until at least 80 percent of the frame is capped before considering it for extraction. If you harvest frames with too much uncapped nectar, the moisture content will be too high, and the honey will eventually sour in the jar.
You can perform a simple shake test in the field to check for ripeness. If you hold a frame horizontally and give it a firm shake and nectar droplets fly out of the cells, the moisture content is too high. If the nectar stays put, the bees have likely reduced the water content sufficiently even if the capping is not quite finished. However, for a definitive measurement, you should use a honey refractometer. This tool provides a precise percentage reading of the water content. The USDA Standards for Grades of Extracted Honey emphasize that Grade A honey must have a moisture content of no more than 18.6 percent.
Beyond the moisture levels, you must consider the local nectar flow. In many regions, the main flow ends in mid to late summer. As the flow tapers off, bees may begin to consume the honey they have already stored. Monitoring the weight of the hive and the activity at the entrance will help you determine when the surplus is ready for removal. You must also ensure that you are leaving enough honey for the bees to survive the winter. For northern climates, this often means leaving 60 to 90 pounds of honey in the deep boxes. For hobbyists, the priority is always the survival of the colony over the volume of the harvest. If the season was poor, the most responsible decision is to leave the honey for the bees and wait for a better year.
Essential Equipment for a Successful Harvest
Honey extraction is a mechanical process that requires a dedicated set of tools to be efficient and sanitary. For the hobbyist with one to five hives, a manual extractor is the most cost-effective and practical choice. You should grab a Hardin IH-1-5L 2-Frame Stainless Steel Manual Honey Extractor if you are working with a small number of frames and want a durable, food-grade stainless steel unit that is easy to clean. Manual extractors allow you to control the speed of the spin, which is critical when working with fragile foundationless frames or new wax.
In addition to the extractor, you need a system for uncapping the frames. This involves removing the wax cappings that seal the honey in the cells. A heated uncapping knife is the preferred tool for many because it slices through the wax like butter, but a cold serrated knife can work if kept sharp. You will also need an uncapping tank or a large tub with a crossbar to hold the frames while you work. For a complete setup that includes the basics for a first-time harvester, you should pick up the VIVO Honey Extraction Starter Kit, which bundles the extractor with uncapping tools and a honey gate.
Once the honey is spun out of the frames, it must be filtered to remove wax particles, bee parts, and other debris. A multi-stage straining system is the best approach. You should use a coarse stainless steel sieve first, followed by a fine mesh bag. You’ll need a Premium Honey Strainer Bag Set to ensure the final product is clear and free of impurities. These bags can be fitted over a standard five-gallon food-grade bucket equipped with a honey gate for easy bottling. Professional-grade equipment from suppliers like Mann Lake can provide more robust uncapping tanks if you find your apiary expanding beyond a few hives. High quality glass jars and lids can be sourced from Dadant to ensure your finished product has a professional presentation and an airtight seal.
The Step-by-Step Honey Extraction Process
The actual extraction should take place in a bee-tight, indoor environment. Working outside will inevitably trigger a robbing frenzy, as every bee within a two-mile radius will be drawn to the scent of exposed honey. The room should be warm, ideally between 80 and 90 degrees Fahrenheit. Warm honey has a lower viscosity and flows much more easily out of the combs and through the filters. If the honey is too cold, the extraction process will be slow, and you may leave a significant amount of honey behind in the cells.
Safety Warning: Beekeeping equipment can be heavy. A full 10-frame medium super can weigh over 50 pounds. Use proper lifting techniques and consider using a cart or a second person to move supers from the apiary to the extraction room. Additionally, ensure all surfaces are food-safe and sanitized. If you are using any electrical equipment, such as a heated uncapping knife, be mindful of cords near sticky surfaces and water.
- Clear the bees from the supers. Use a bee brush, a fume board with a bee repellent, or a bee escape board installed 24 hours prior to harvest. Ensure no bees remain on the frames when you bring them inside.
- Uncap the frames. Hold the frame vertically over your uncapping tank. Using your uncapping knife, slice upward or downward, just under the layer of wax cappings. Try to remove only the wax, leaving as much of the cell wall intact as possible. Use an uncapping scratcher to reach any low spots or indentations the knife missed.
- Balance the extractor. Place the uncapped frames into the extractor baskets. It is vital to balance the weight. If you have one heavy frame, place another frame of similar weight opposite it. If you only have one frame to spin, you must find a counterbalance to prevent the extractor from wobbling or “walking” across the floor during the spin.
- Spin the frames. Start spinning slowly. If you use a tangential extractor (where one side of the frame faces the wall), you must spin one side partially, flip the frame, spin the second side completely, and then flip back to finish the first side. This prevents the weight of the full side from blowing out the wax mid-spin. For radial extractors, the honey is pulled from both sides simultaneously.
- Filter and settle. Open the honey gate at the bottom of the extractor and let the honey flow through your straining bags into a food-grade bucket. Once the bucket is full, let it sit for 24 to 48 hours. This allows air bubbles and the smallest wax particles to rise to the top, where they can be skimmed off before bottling.
This process is repetitive but requires attention to detail. If you spin too fast, you risk breaking the comb. If you don’t filter carefully, your honey will appear cloudy and may crystallize faster due to the presence of small particles that act as nuclei for crystal growth. For more information on the fundamentals of hive management, you may find our guide on Best Beginner Beekeeping Starter Kits Under 150 useful for understanding the initial investment in gear.
Common Honey Extraction Mistakes to Avoid
The most significant mistake a beginner can make is harvesting honey with a high moisture content. It is tempting to pull frames that are only half-capped when the season is ending, but this honey will almost certainly ferment. Fermentation produces carbon dioxide and alcohol, which ruins the flavor and can even cause jars to leak or explode. If you are unsure about the moisture level, leave the frame in the hive for another week. The bees are the experts at curing honey; trust their timing.
Another frequent problem is failing to manage the “robbing” behavior of the bees during the harvest. When you remove honey supers, you are exposing a massive food source. If you leave supers sitting on the ground or in an open garage, the bees will find them within minutes. This can lead to a chaotic situation where bees become extremely aggressive, attacking anything near the hive. Always keep removed supers covered with a heavy cloth or a telescoping lid and move them into a sealed building as quickly as possible.
Temperature control is also a common area for errors. If you extract in a cold basement, the honey will be thick and sluggish. This leads to longer spin times and more honey wasted in the extractor and on the filters. Conversely, you must never heat honey above 110 degrees Fahrenheit if you wish to preserve its “raw” status. Excessive heat destroys the delicate enzymes and floral aromas that make local honey valuable. Use a space heater to warm the room, not the honey itself.
Finally, do not neglect the post-extraction care of your equipment. Honey is acidic and can eventually pit even stainless steel if left for long periods. Furthermore, any honey residue left on the equipment will attract pests. Once you are finished, you should place your “wet” supers back on the hives for the bees to clean. They will lick the frames dry within 24 hours. After the bees have cleaned them, store the supers in a way that prevents infestation. For detailed strategies on protecting your equipment after the harvest, refer to our article on Wax Moth Prevention And Treatment.
Managing Post-Extraction Cleanup and Storage
Once the honey is in the settling tank and the jars are filled, the work of the harvest shifts to maintenance and storage. The frames you just extracted are a valuable resource. Because the bees do not have to rebuild the wax, they can fill these “drawn” combs much faster during the next nectar flow. However, drawn comb is highly attractive to wax moths and small hive beetles. If you are not putting the supers back on a strong colony immediately, you must store them in a cool, dry place. Some beekeepers prefer to freeze the frames for 24 to 48 hours to kill any existing eggs or larvae before storing them.
Frequently Asked Questions
How much honey should I leave for the bees for winter? In northern climates, it is generally recommended to leave 60 to 90 pounds of honey. In warmer southern climates, 30 to 50 pounds may be sufficient. Always prioritize the colony’s survival over your harvest volume.
What happens if I harvest honey with too much moisture? Honey with a moisture content above 18.6% is likely to ferment. Fermentation creates alcohol and carbon dioxide, which ruins the flavor and can cause pressure to build up inside sealed jars.
Do I need to wash my honey extractor after every use? Yes. You should clean your extractor with warm, soapy water and rinse it thoroughly after each harvesting session to prevent bacteria growth and ensure the equipment remains in good condition.
How can I tell if honey is ripe without a refractometer? You can use the “shake test.” Hold a frame horizontally and give it a firm shake; if nectar droplets fly out, the moisture content is too high. Additionally, ensure at least 80% of the cells on the frame are capped with wax.
Enjoyed this guide? Bookmark it for later or share it with a friend who might find it useful.