How to make and sell beeswax candles
This post contains affiliate links. As an Amazon Associate, I earn from qualifying purchases at no extra cost to you.
Beeswax candles represent the pinnacle of home apiary products, offering a sustainable, non-toxic alternative to the paraffin options that dominate the mass market. While honey is the primary harvest for most backyard beekeepers, the wax produced by your hives is a high-value byproduct that often goes underutilized. Beeswax possesses a higher melting point than other waxes, which results in a longer, cleaner burn and a natural honey scent that synthetic fragrances cannot replicate. Transitioning from raw wax to a finished, marketable candle requires technical precision, specifically regarding temperature control and wick selection. If you want to maximize the revenue from your small-scale operation, mastering the craft of candle making is the most effective way to turn “waste” wax into a premium retail item.
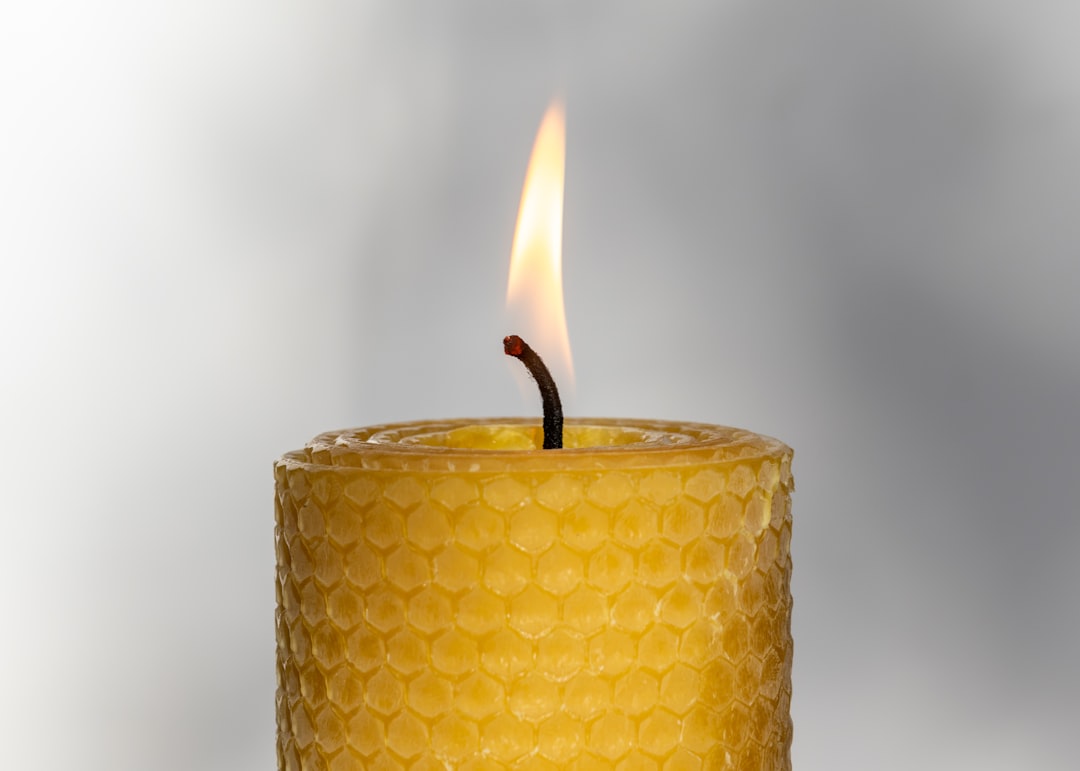
Photo by Andrew Dawes on Unsplash
Sourcing and Preparing High Quality Beeswax
The quality of your finished candle depends entirely on the purity of your starting material. For the best results, you must distinguish between cappings wax and old brood comb. Cappings wax, the fresh wax bees use to seal honey cells, is the lightest in color and contains the fewest impurities. This wax is the gold standard for candle making because it requires less filtration and produces a bright, golden hue. If you are just starting and do not yet have a massive stockpile of your own wax, you can pick up a Beeswax Candle Making Kit with 10 Full Size Honeycomb Beeswax Sheets to practice the rolling technique before committing to the melting and pouring process.
If you are using wax from your own hives, you must render it thoroughly to remove “slumgum,” which consists of propolis, pollen, and cocoon silk. Any debris left in the wax will clog the wick, leading to a poor burn or a candle that repeatedly self-extinguishes. To achieve professional-grade purity, melt your wax in a solar melter or a double boiler and pass it through a fine filter. While cheesecloth is common, industrial felt filters or multiple layers of high-thread-count cotton provide a much cleaner finish. For those who find their own supply insufficient for a large production run, reputable suppliers like Mann Lake offer bulk blocks of yellow beeswax that meet the standards required for clean-burning candles.
The color of the wax also plays a role in your branding. Natural beeswax ranges from nearly white to a deep, dark orange, depending on the forage available to the bees. If you want to offer a variety of aesthetics, you can purchase a Beeswax Candle Making Kit with Pastel Colors Honeycomb Sheets to supplement your natural harvest. This allows you to provide customers with options that fit their home decor while maintaining the benefits of a beeswax base. For a deeper look at the initial cleaning process, refer to our guide on beeswax uses and how to render it at home.
Choosing the Right Wick and Mold for Beeswax
Beeswax is a unique medium because it is much denser than soy or paraffin. This density requires a specific type of wick to ensure the flame has enough heat to melt the wax pool effectively. You must use square braid cotton wicks. Round wicks, which are standard for soy candles, will often “drown” in beeswax because they do not have the structural integrity to stay upright and open in the high-heat environment of a beeswax flame. Square braid wicks are designed to curl slightly as they burn, which keeps the tip of the wick in the hottest part of the flame, resulting in a self-trimming effect.
The diameter of the wick must be matched to the diameter of your candle. A wick that is too small will cause “tunneling,” where the flame burns a hole down the center of the candle, leaving a thick wall of unburnt wax. A wick that is too large will produce a massive flame that smokes and soots. Most suppliers, including Dadant, provide wicking charts that correlate wick size (e.g., #2/0, #1, #2) with the width of the candle mold. For a standard 2-inch diameter pillar candle, a #2 square braid wick is typically the industry recommendation.
When it comes to molds, silicone is the superior choice for hobbyists. While metal molds are traditional and durable, they require the use of mold release sprays and can be difficult for beginners to de-mold without damaging the candle surface. Silicone molds are flexible, allowing you to peel the mold away from the wax once it has cooled. This is particularly useful for intricate designs, such as skep shapes or floral patterns, which are highly popular at farmers markets. If you want to experiment with different additives while learning the ropes, you should grab a SUPERSUN Candles Making Kit for Adult with Beeswax, Essential Oils, Dyes to see how scents and colors interact with the natural properties of the wax.
How to Make and Sell Beeswax Candles for Profit
Turning a hobby into a business requires a shift in focus from production to margins. To make and sell beeswax candles profitably, you must accurately calculate your cost of goods sold (COGS). This includes the market value of your wax, the cost of wicks, any packaging or labels, and the electricity used for melting. Many beekeepers undervalue their wax because they “got it for free” from their bees, but you must price your candles based on the replacement cost of the wax. If you were to sell that raw wax to a supplier, what would you get? That is your baseline cost.
Marketing beeswax candles involves educating your customers on the benefits of the material. Most consumers are accustomed to cheap, $5 paraffin candles from big-box stores. You must justify a $15 to $25 price point for a single beeswax pillar. Highlight that beeswax is a natural ionizer; when burned, it releases negative ions that help neutralize pollutants like dust, mold, and odors in the air. Emphasize the long burn time. A well-made beeswax candle can burn up to three times longer than a paraffin candle of the same size. These talking points transform the candle from a simple light source into a premium wellness product.
Sales channels for small-scale producers usually begin with local markets and online platforms like Etsy. At a physical market, the scent of the wax is your best salesperson. Keep a “tester” candle burning at your booth to draw people in with the natural honey aroma. For online sales, high-quality photography is non-negotiable. Use natural lighting to capture the texture and color of the wax. Ensure your labeling is professional and compliant with local regulations. Most jurisdictions require a fire safety warning label on the bottom of every candle. For more advice on navigating the logistics of local sales, see our article on selling honey locally.
Step-by-Step Guide to Pouring Beeswax Candles
SAFETY WARNING: Molten beeswax is highly flammable and can cause severe burns. Never melt wax directly on a stove burner; always use a double boiler setup. Keep a fire extinguisher rated for grease or chemical fires nearby. Never leave melting wax unattended. Ensure your workspace is equipped with a functioning carbon monoxide detector if using gas heating elements.
-
Set Up Your Double Boiler: Fill a large pot with a few inches of water and place a dedicated wax-melting pitcher inside. Heat the water until it reaches a gentle simmer. Place your filtered beeswax blocks into the pitcher. You’ll need a reliable thermometer to monitor the temperature. Beeswax melts at approximately 145 degrees Fahrenheit, but you should aim for a pouring temperature between 160 and 170 degrees Fahrenheit to ensure the wax flows smoothly into all the details of your mold.
-
Prepare the Molds and Wicks: While the wax is melting, prepare your molds. If using silicone, ensure they are clean and dry. Thread your square braid wick through the hole at the bottom of the mold (which will be the top of the candle). Secure the wick at the bottom with a wick plug or a small amount of clay to prevent leakage. At the open end of the mold, use a wick bar or a simple clothespin to center the wick and keep it taut. A centered wick is the most critical factor for an even burn.
-
The Pour and Cool Process: Once the wax reaches 165 degrees Fahrenheit, carefully pour it into the molds. Pour slowly to minimize the formation of air bubbles. Fill the mold to the very top, as beeswax shrinks slightly as it cools. Set the molds in a draft-free area at room temperature. Cooling too quickly in a cold room can cause the wax to crack or pull away from the wick. Allow the candles to sit for at least 12 to 24 hours before de-molding. Once removed, trim the wick to a quarter-inch and use a warm putty knife to level the base of the candle if it has dipped during cooling.
Common Mistakes to Avoid in Beeswax Candle Making
The most frequent mistake in beeswax candle making is improper temperature management. If you pour the wax when it is too hot (above 180 degrees Fahrenheit), you risk damaging silicone molds and causing significant shrinkage, which leads to deep “sinkholes” around the wick. Conversely, pouring when the wax is too cool (below 155 degrees Fahrenheit) results in “jump lines” or visible ripples on the surface of the candle where the wax began to solidify as it was being poured. Use an infrared or candy thermometer to verify your temperatures every single time; do not rely on visual cues like the wax “looking thin.”
Another common issue is “wick drowning” caused by wax impurities. Even if you have filtered your wax once, micro-particles of propolis or honey can remain. These particles travel up the wick as the candle burns and eventually clog the capillary action, causing the flame to flicker and die. If your candles are struggling to stay lit despite using the correct square braid wick, your wax likely needs a second, finer filtration. You can also try “priming” your wicks by dipping the raw cotton braid into molten wax and letting it dry before inserting it into the mold. This ensures the wick is ready to draw fuel the moment it is lit.
Finally, avoid the temptation to add too much fragrance or essential oil. Beeswax has a natural, complex scent that often clashes with synthetic perfumes. Furthermore, beeswax can only hold about 6 percent fragrance oil by weight. Exceeding this limit will cause the oil to “bleed” out of the finished candle, creating a greasy surface and a significant fire hazard, as the unbonded oil can ignite. If you must add scent, choose oils with high flash points and stir them into the wax thoroughly for at least two minutes at 165 degrees Fahrenheit before pouring.
FAQ
Why is my beeswax candle cracking as it cools? Cracking is almost always a result of thermal shock. When the outer layer of the wax cools and hardens significantly faster than the inner core, the resulting tension causes the wax to split. This is common in very cold workshops or when candles are placed near a window or air conditioning vent. To prevent this, ensure your pouring environment is at least 70 degrees Fahrenheit. You can also pre-heat your molds (especially metal ones) in a low oven or with a heat gun before pouring. Slowing down the cooling process by wrapping the molds in a towel or placing them inside an insulated box can also eliminate cracking issues.
How do I choose the right wick size for beeswax? Choosing a wick requires matching the wick’s “burn pool” diameter to the candle’s actual diameter. For beeswax, you must use square braid cotton wicks. A #2/0 or #1/0 wick is typically used for small votives or tapers under 1 inch. A #1 or #2 wick is standard for 2-inch pillars. For large 3-inch pillars, you may need a #4 or #5 wick. The goal is for the candle to melt the wax all the way to the edge of the container or pillar within 2 to 3 hours of burning. If a “wall” of wax remains, you need a larger wick. If the wax spills over the side of a pillar, you need a smaller wick.
Is it legal to sell beeswax candles from home? In most regions, selling candles is legal under general business licenses, but you must adhere to labeling and safety standards. The most important requirement is the ASTM (American Society for Testing and Materials) standards for candle safety. This includes a cautionary label that warns users to keep the candle within sight, away from flammable objects, and out of reach of children. You should also check with your local homeowner’s association or city zoning laws if you plan to run a high-volume manufacturing operation out of a residential kitchen, as some areas have restrictions on home-based industrial activities involving open flames or chemical storage.
Conclusion
Mastering the production of beeswax candles allows you to capture the full value of your apiary’s output. By focusing on high-quality cappings wax, selecting the correct square braid wicks, and maintaining strict temperature controls, you can create a product that commands a premium price at any market. While the technical requirements are higher than those for soy or paraffin, the resulting candle is a superior, long-burning, and environmentally friendly item that customers will seek out. Start with a simple mold or a rolling kit to hone your skills, then scale your production as your wax harvest increases.
Bookmark this guide for your next wax rendering session to ensure your pouring temperatures and wick choices are optimized for a professional finish.
Related reading
Ready to start making candles from your hive? Drop a comment below with your first batch results, or share this guide with a fellow beekeeper who could use a new revenue stream.