Top bar hive management: a complete guide
This post contains affiliate links. As an Amazon Associate, I earn from qualifying purchases at no extra cost to you.
Top bar beekeeping offers a more natural, less intrusive way to manage honey bees, but it requires a fundamental shift in how you view the colony. Unlike the standardized Langstroth system where bees are forced to build on plastic foundation, top bar hives allow for natural comb construction. This freedom is the greatest benefit of the system, yet it also presents the biggest challenge for the uninitiated keeper. If you approach a horizontal top bar hive with the same “set it and forget it” mentality used in commercial box stacking, you will quickly face a structural disaster known as cross-comb. Success in this niche requires an active, observant management style that prioritizes the structural integrity of the wax over the sheer volume of honey production.
The learning curve for top bar hives is steep because the equipment is less forgiving of gravity and heat. You cannot simply pull a frame and flip it horizontally to inspect both sides; doing so with a heavy, foundationless top bar will result in the entire comb snapping off and falling into the dirt. To manage these hives effectively, you must develop a gentle touch and a keen eye for how bees utilize space. Before you even open the hive, you should grab a Stainless Steel Beekeepers Hive Tool Set with a Very Strong Flat Bar to ensure you can cleanly separate bars that the bees have inevitably glued down with propolis. This small investment is the most practical way to prevent jarring the colony during your initial inspections.
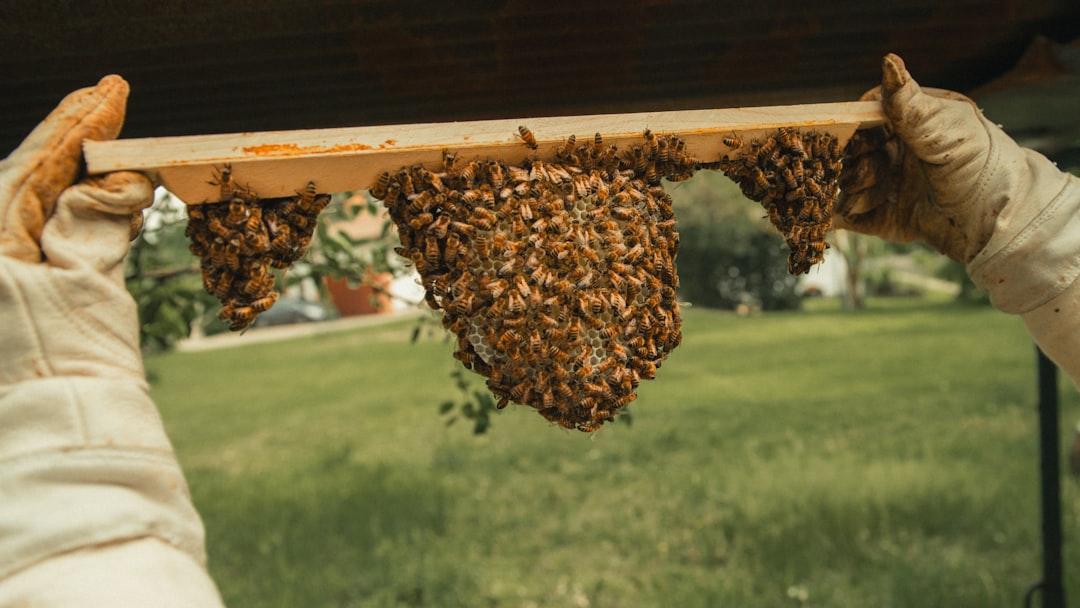
Photo by paolo tognoni on Unsplash
The Core Principles of Top Bar Hive Management
Effective top bar hive management begins with understanding that you are managing a horizontal cavity rather than a vertical stack. In a traditional Langstroth hive, bees move upward to store honey, following their natural instinct to keep the brood nest at the bottom and the pantry at the top. In a top bar hive, the bees must move laterally. This horizontal expansion requires the beekeeper to act as a facilitator, ensuring that the bees always have enough room to grow without leaving so much empty space that the hive becomes difficult to defend or thermally regulate. You must move the follower board, a movable wooden partition, to adjust the interior volume of the hive based on the strength of the colony.
The lack of foundation is the defining characteristic of this method. Bees build “catenary” curves, which are naturally strong shapes, but they are only strong when hanging vertically. If your hive is not perfectly level from side to side, the bees will build their comb according to the pull of gravity, not the center line of your bars. This leads to combs that are attached to multiple bars, making it impossible to remove a single bar for inspection without tearing the hive apart. Therefore, the first rule of management is ensuring your hive stand is rock solid and perfectly level. You should check this level every spring, as ground settling can ruin a perfectly good setup over the winter.
Another core principle is the “brood nest stability” rule. Because you aren’t swapping boxes or adding supers, you have much more control over the brood nest. However, you should rarely move the bars within the brood nest itself. The bees organize their nest with specific gradients of temperature and pheromones. Disrupting this order by inserting empty bars into the middle of the brood nest can chill the larvae or confuse the queen. Management should focus on the edges of the nest, adding empty bars between the last brood comb and the first honey comb to encourage expansion. This method mimics the natural growth of a hollow tree colony and keeps the bees focused on productive building.
Setting Up Your Apiary for Top Bar Hive Management
When you decide to move into top bar beekeeping, you have two primary paths: building your own or purchasing a pre-made kit. Because top bar hives are not standardized like Langstroth equipment, dimensions vary wildly between manufacturers. If you are handy with a saw, you should pick up the Build Your Own Beekeeping Equipment eBook to understand the structural requirements of a horizontal hive. If you prefer a more guided approach with proven dimensions that minimize cross-comb, you’ll need to grab the Top Bar Hive DIY Plans by Gold Star Honeybees. These plans are widely regarded as the gold standard for hobbyists because they utilize a specific angle for the side walls that discourages bees from attaching the comb to the sides of the box.
Beyond the hive itself, your apiary setup must account for the unique ergonomics of horizontal beekeeping. Since you aren’t lifting heavy 50 pound boxes, you can place top bar hives at waist height, which is a significant advantage for those with back issues. However, you need ample “swing room” around the hive. When you pull a bar, you need to be able to step back and rotate the bar along its long axis. Unlike vertical hives where you stand behind the stack, with a top bar hive, you usually work from the side or the end opposite the entrance. Ensure your hive is positioned so that you aren’t blocking the flight path while you work.
You also need to consider ventilation and insulation. Most top bar hives feature a “long idea” design with a hinged or removable roof. Under that roof, there is often a significant air gap. In hot climates, this can lead to comb collapse if the hive is in direct afternoon sun. You’ll need to ensure your hive has screened bottom boards or adjustable vents. For protective gear and smokers that stand up to regular use, Dadant provides professional grade options that are essential for any backyard apiary. While the top bar hive is often marketed as a “low tech” option, using high quality tools like a standard bellows smoker is non-negotiable for safe management.
The Critical Art of Managing Straight Comb
The most common failure in top bar beekeeping is the loss of “comb straightness.” Once the bees start building across the bars, every subsequent comb will follow that crooked path, eventually turning the hive into a solid block of wax that cannot be inspected. To prevent this, you must use a “starter strip” or a “wedge” on the underside of every bar. Some keepers rub a small amount of beeswax onto the wedge to give the bees a scent trail to follow. The goal is to force the bees to start the midrib of the comb exactly in the center of the bar.
During the first few weeks of a new colony, you must inspect the hive every 3 to 5 days. This is the only time you can easily fix mistakes. If you see a comb starting to veer off the center line, you can gently push it back into place with your fingers or a hive tool. Since the wax is new and soft, it is very pliable. If a comb is significantly crooked, you may need to cut it off and let them start over. It feels wasteful, but it is better to lose one week of building than to have a hive that is legally uninspectable. Most states require that frames or bars be removable for disease inspection, so straight comb is a legal necessity, not just a preference.
Once the bees have built 3 or 4 perfectly straight combs, these act as guides for all future growth. You can then begin a “checkerboarding” technique where you place an empty bar between two straight, established combs. The bees will use the existing combs as walls, naturally building the new comb straight down the middle of the empty bar. This is the most effective way to expand the hive during a heavy nectar flow. For more advanced strategies on how to use the resulting wax, see our guide on beeswax uses and how to render it at home.
Seasonal Management and Winter Preparation
Top bar hive management changes significantly with the seasons. In the spring, your primary goal is swarm prevention. Because the hive is horizontal, bees can feel “crowded” even if there is plenty of empty space at the far end of the hive. You must actively move the follower board and add empty bars to the edge of the brood nest to convince the bees they have room to grow. If the brood nest becomes “honey bound,” meaning the bees have filled the cells surrounding the brood with nectar, the queen will have nowhere to lay, and the colony will swarm. You must be proactive in harvesting or moving honey bars to the back of the hive to keep the brood area open.
In the summer, the focus shifts to honey production and heat management. Top bar hives produce less honey than Langstroth hives because the bees must expend energy building new wax every year rather than reusing spun-out combs. However, the honey you do get is often of higher quality and contains less chemical residue since the wax is fresh. During the hottest months, ensure the hive is shaded. Comb collapse is a real threat in top bar hives; if the internal temperature gets too high, the wax softens and the weight of the honey causes the entire structure to fall.
Winter preparation is the most difficult aspect of top bar beekeeping in cold climates. In a vertical hive, the heat from the cluster rises and warms the honey stores above them. In a horizontal hive, the cluster must move sideways to reach their food. If there is a “break” in the comb or if the weather is too cold for the cluster to move laterally, they can starve just inches away from plenty of honey. To prevent this, you should consolidate the colony in the fall. Move all the honey bars directly adjacent to the brood nest and use the follower board to create a tight, insulated space. You can also add “dummy boards” filled with insulation to the empty ends of the hive to help retain heat. For a month-by-month breakdown of these tasks, refer to our seasonal beekeeping calendar.
Step-by-Step Guide to Inspecting a Top Bar Hive
Inspecting a top bar hive requires a different physical technique than a standard boxed hive. Because the combs are attached only at the top, they are fragile and prone to breaking if tilted. Follow this sequence to ensure a safe and productive inspection.
- Prepare and Smoke the Entrance: Start by lighting your smoker and puffing a small amount of cool white smoke into the entrance. Wait about 60 seconds for the bees to retreat and begin engorging on honey, which makes them calmer.
- Access from the Empty End: Never open the hive directly over the brood nest. Instead, remove the roof and start from the back of the hive, behind the follower board. This allows you to slide bars back one by one, creating a “work gap” that prevents you from rolling or crushing bees.
- Separate the Propolis Seals: Use your flat hive tool to gently pry the bar you intend to lift from its neighbors. Bees use propolis to seal every crack. If you pull too hard without prying first, the bar will “pop” loose, jarring the colony and potentially causing a comb to drop.
- Lift Vertically and Rotate Correctly: Lift the bar straight up out of the hive. To view the other side, do not flip it like a pancake. Instead, rotate the bar like a steering wheel, keeping the comb in a vertical plane at all times. This ensures that gravity is always pulling the wax straight down toward the ground rather than pulling it sideways.
- Check for Attachments: As you lift, look down the sides of the hive body. If the bees have attached the comb to the side walls (side attachments), use a long, thin knife or a specialized top bar tool to slice the connection before lifting the bar all the way out.
- Re-assemble and Close: Slide the bars back into their original positions, ensuring there are no gaps between them. Top bars should be flush against each other to prevent heat loss and keep bees from moving into the “attic” space under the roof.
Safety Warning: Beekeeping involves inherent risks, including stings and the use of sharp tools. Always wear appropriate protective gear, including a veil and gloves, especially when learning the delicate handling required for top bar hives. If you are allergic to bee stings, consult a medical professional before starting an apiary. Additionally, ensure you have a functioning carbon monoxide detector in your home if you store any gas powered equipment or smokers in attached garages.
Avoiding Common Top Bar Management Mistakes
The most frequent mistake new top bar keepers make is failing to keep the hive level. Gravity is the “architect” of foundationless beekeeping. If the hive leans even two degrees to the left, the bees will build their comb two degrees off-center. Over the length of a 17 inch top bar, that deviation is enough to make the comb attach to the adjacent bar. You must use a spirit level on the top bars themselves, not just the roof or the stand, to ensure the building surface is perfectly horizontal.
Another common problem is “over-harvesting” in the first year. Because top bar hives are beautiful and the comb honey is tempting, beginners often take too much. Remember that a top bar colony must build every single square inch of their home from scratch. This requires an immense amount of nectar. In the first year, your primary goal is colony survival and comb establishment, not honey production. If you take honey in the first fall, you are likely sentencing the colony to starvation during the winter. A practical approach is to leave at least 10 to 12 full bars of honey for the bees in temperate climates.
Finally, many keepers ignore the “side attachment” issue until it is too late. While some hive designs, like the Gold Star plans, minimize this, bees will still occasionally anchor heavy honey combs to the side walls for stability. If you try to lift a bar that is attached to the side, you will tear the comb. You must develop the habit of looking down the wall as you lift and using your tool to “zip” the comb free from the wall. For sourcing specialized tools that can reach the bottom of deep top bar hives, Mann Lake offers a variety of long reach scrapers and brushes that are more effective than standard short hive tools.
Top Bar Management FAQ
How do I handle Varroa mites in a top bar hive?
Managing Varroa mites in a top bar hive is similar to other systems, but you must be careful with certain treatments. Many chemical treatments are designed for the dimensions of a Langstroth frame and may not fit or distribute correctly in a horizontal cavity. Formic acid pads, for example, require specific airflow that can be difficult to achieve in a long hive. A better approach for top bar hives is the use of powdered sugar dusting or essential oil treatments that can be applied across the top of the bars. However, the most effective management tool is the “brood break.” When a colony swarms or when you purposefully split a colony, the period without capped brood naturally crashes the mite population. Always monitor mite levels using a sticky board at the bottom of the hive to ensure your management is working.
Can I get as much honey from a top bar hive as a Langstroth?
Generally, no. You should expect about 20% to 30% less honey from a top bar hive compared to a well-managed Langstroth setup. This is because the bees must “eat” about 7 to 10 pounds of honey to produce just one pound of wax. In a Langstroth system, you spin the honey out and give the empty wax back to the bees, saving them that massive energy expenditure. In a top bar hive, you are harvesting the wax and the honey together. The tradeoff is that you get a valuable harvest of clean, virgin beeswax every time you harvest honey. For hobbyists, the quality of the raw comb honey and the abundance of wax usually outweigh the lower total volume of honey.
What do I do if my comb collapses?
Comb collapse is a messy but fixable problem. If a comb falls during an inspection or due to heat, you must remove the fallen wax immediately. If it stays on the bottom of the hive, it will attract pests like wax moths and small hive beetles, and it may bridge the gap between other combs, causing a massive cross-comb mess. If the fallen comb contains brood, you can sometimes “rescue” it by tieing it back onto a top bar using cotton string. The bees will eventually wax the string into the comb and then chew the string away once the connection is secure. If the fallen comb is just honey, it is best to harvest it immediately and let the bees start fresh.
Conclusion
Mastering top bar hive management is a journey toward a more intimate understanding of honey bee biology. By removing the rigid structure of plastic foundation, you allow the colony to express its natural tendencies, resulting in a healthier and more resilient apiary. Success requires you to be diligent about leveling your equipment, proactive in managing straight comb, and conservative in your honey harvesting. While the yields may be lower than industrial methods, the rewards of working with a horizontal system include easier physical labor and the production of pristine, natural beeswax. Your next step should be to verify the level of your hive stands and ensure your follower boards move freely before the spring nectar flow begins.
If you found this guide helpful, consider bookmarking it for your next hive inspection or sharing it with your local beekeeping club.